Editing Riser

In the kitchen planner, wall and high cabinets can be enhanced with a riser. This riser option is editable by the customer via the Edit panel of the cabinet.
Any modification on the riser must be prepared beforehand by the Range Manager to ensure the expected behavior.
➡️ See Set Up Risers 🔗 or Set Up Risers through API 🔗 for detailed information on this preparating work.
➡️ See Define Riser Position 🔗 for detailed information on how to place a Riser on a cabinet.
Basic Actions and Options
The basic actions regarding risers are available by clicking the cabinet on the scene and then the Edit icon. They allow the customer to add a riser and then edit it.
Add a Riser
⚙️ Set up: Parameters for Cabinet🔗 and Parameters for Riser🔗.
You can add riser to the wall cabinet, high cabinet and filler.
- Click the Add button of Riser option.
The riser product catalog is displayed, as shown below:
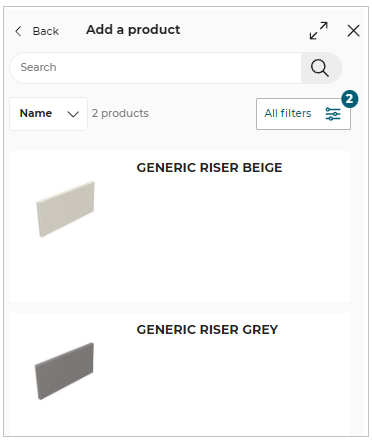
- Select the required product from the catalog.
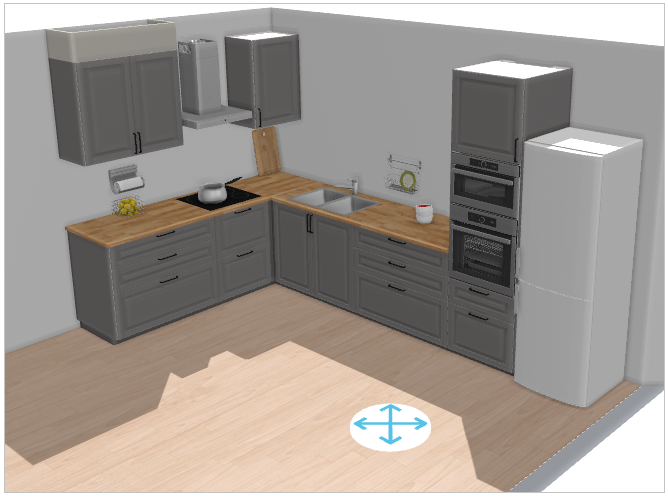
The applied riser product is displayed, as shown below:
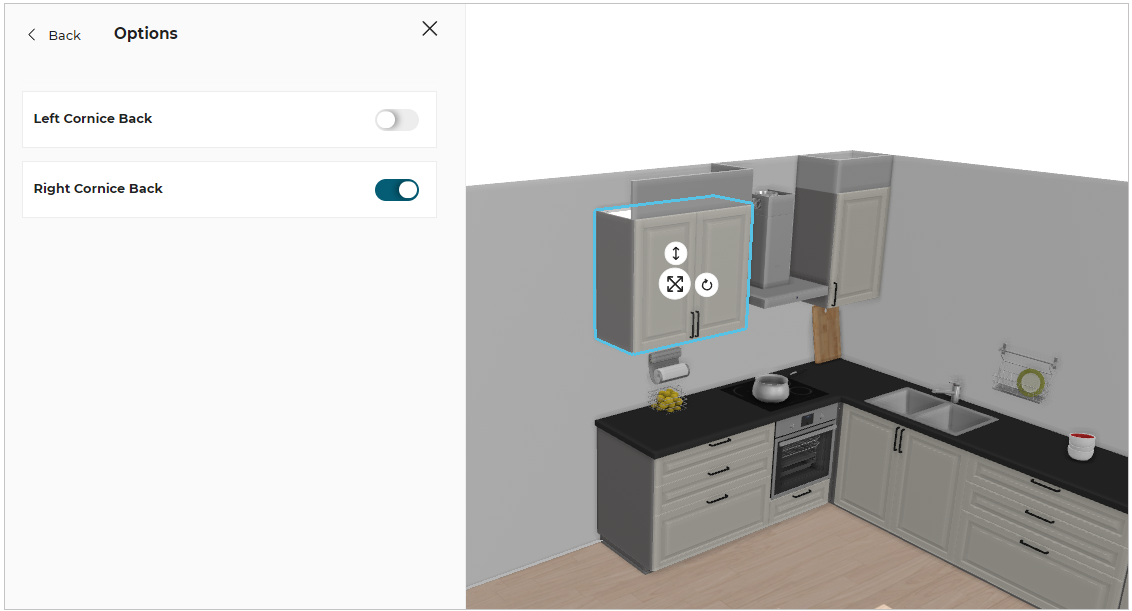
Default Position
⚙️ Set up: 'riserOption', 'leftCorniceBack' and 'rightCorniceBack' parameters on the cabinet.
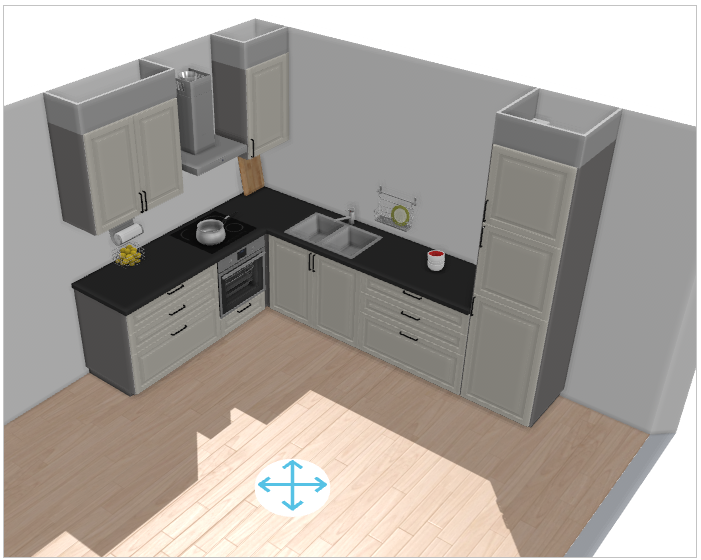
By default, the riser is automatically generated on top front edge of the cabinet, as well as on the sides that are not in contact to a wall. The riser is generated along the narrow top path 🔗 defined on the cabinet.
It is possible to manually deactivate the riser on the sides via the riser options.
📌 When the sides of the wall/high cabinet are touching the wall or if there is a filler strip, riser and cornice are automatically disabled. Risers are also updated depending on the position of the cabinet into a linear. Two adjacent cabinets will merge risers if aligned or create a partial if depths of cabinets are different.
Rules
Some rules manage the activation/deactivation of the riser:
- The riser is automatically removed if the cabinet is in contact with a wall or if a filler strip is activated.
- The riser is automatically removed if the front of the wall cabinet is modified (new door front.)
- If the distance between the top of the cabinet and the ceiling is more than the height of the riser, then it has the maximum height on the riser and keep an open space between the ceiling and the top of the riser.
- When a combination of a riser and a cornice is selected, the riser cover the back of the cornice.
- If a riser with the expected height added in the right style, it is automatically choosen. If several risers in the current style reach the expected height, then the smallest one is selected.
- If no riser is able to reach the expected height in the selected style, then a warning message is displayed in the Help Center to choose another riser/cornice, as shown below:

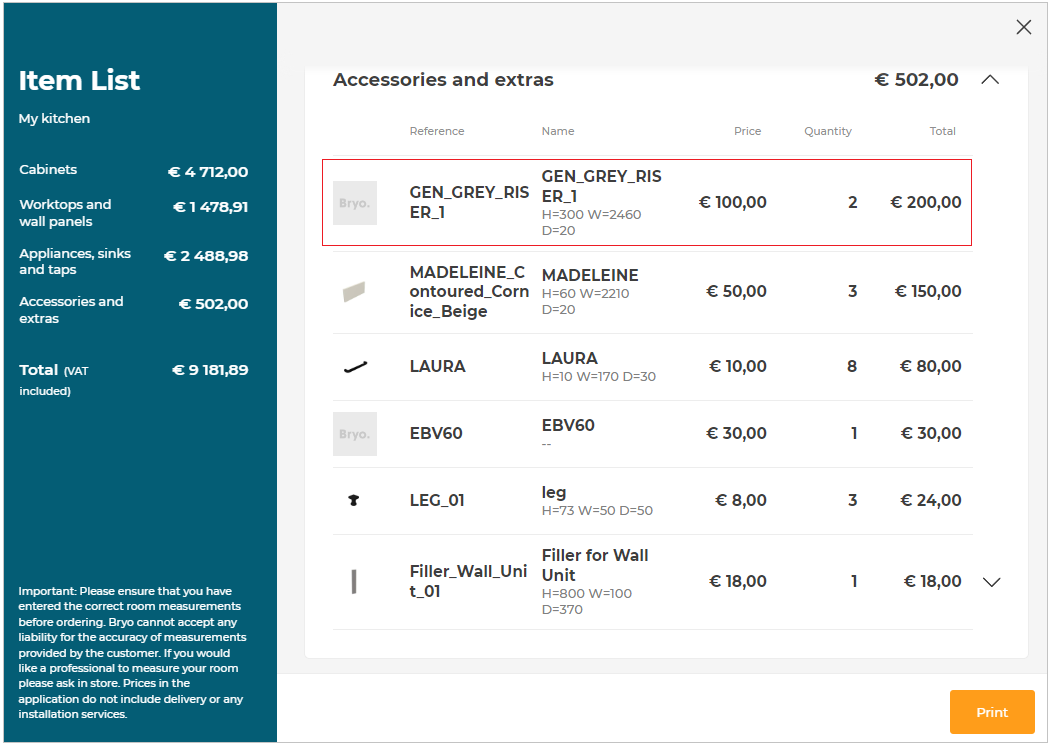
Possible Result in the Item List
Like all the illustrations in this page, this is a BRYO sample
Depending on the customer's choices all products are priced separately and visible in the item list. The pricing of risers is based on precut method 🔗, which means by measuring the total length of the risers divided by the price of one product.