Kitchen Expert Suite - Features
Introduction
The Kitchen Expert Suite offer enables more advanced features in order to allow the kitchen designers to efficiently create projects tailored to their clients' specific needs.
This section provides more details on the advanced features available exclusively through the Kitchen Expert Suite subscription.
Technical view - 2D Design
Designing a kitchen project in 2D is essential for kitchen designers. It allows for a better representation of the available space based on measurements and makes it easier to identify the types of products present in the scene.
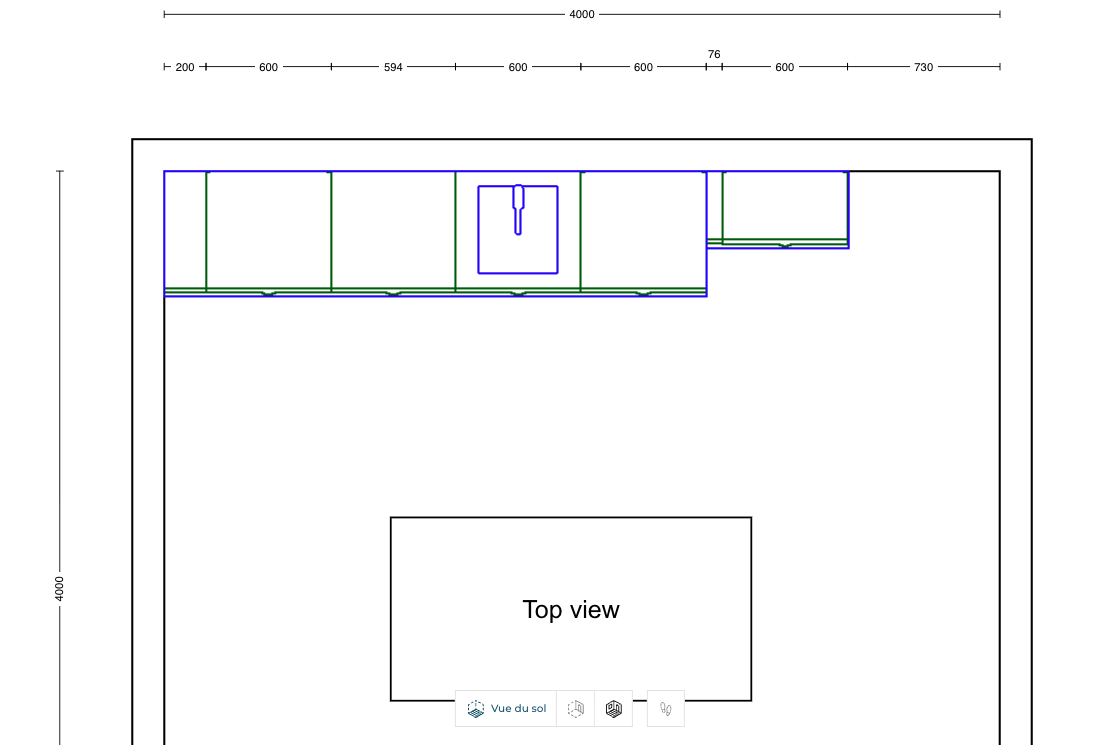
We have different line of dimensions in this view. We can see the dimensions of the room at the top and the dimensions of each product in the second line. If there is some space available between cabinets or at the end of the linear and the wall, we are displaying the dimension of the remaining space.
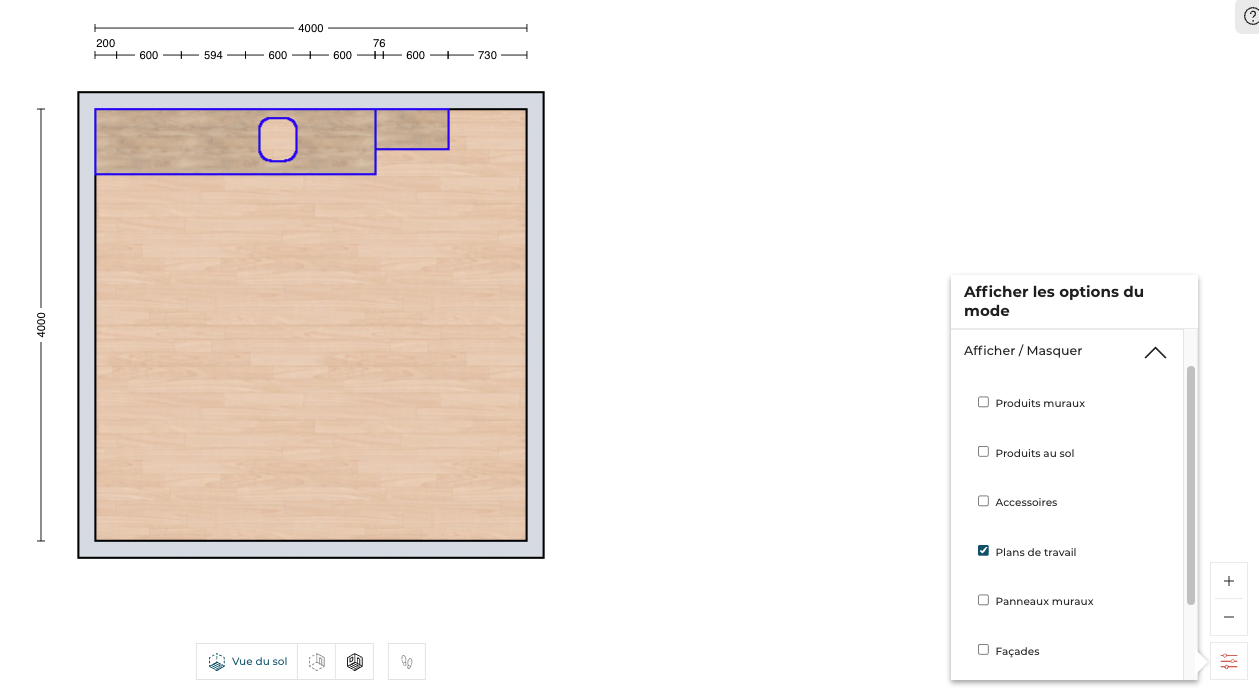
There is also a possibility to display the color of the products and the coverings of the room by enabling the option "Display colour" through the View mode options menu.

In this same menu, you can manage the different layers to provide a dedicated view depending on the product type.
In the example below, the user has chosen to keep only the visible worktops of their project. The "Worktops" checkbox is the only one selected; the others are deactivated.
We also offer the possibility to the retailers to customize the colors of the borders for every type of products. In the example below, the retailer decide to configure the green value for the borders of the worktops. At the same time, the blue color has been chosen for the base units.

📌 The color customization can be configured through the dedicated application distribution setting
designTechnicalView. See the dedicated section Application Distribution Settings for more details.
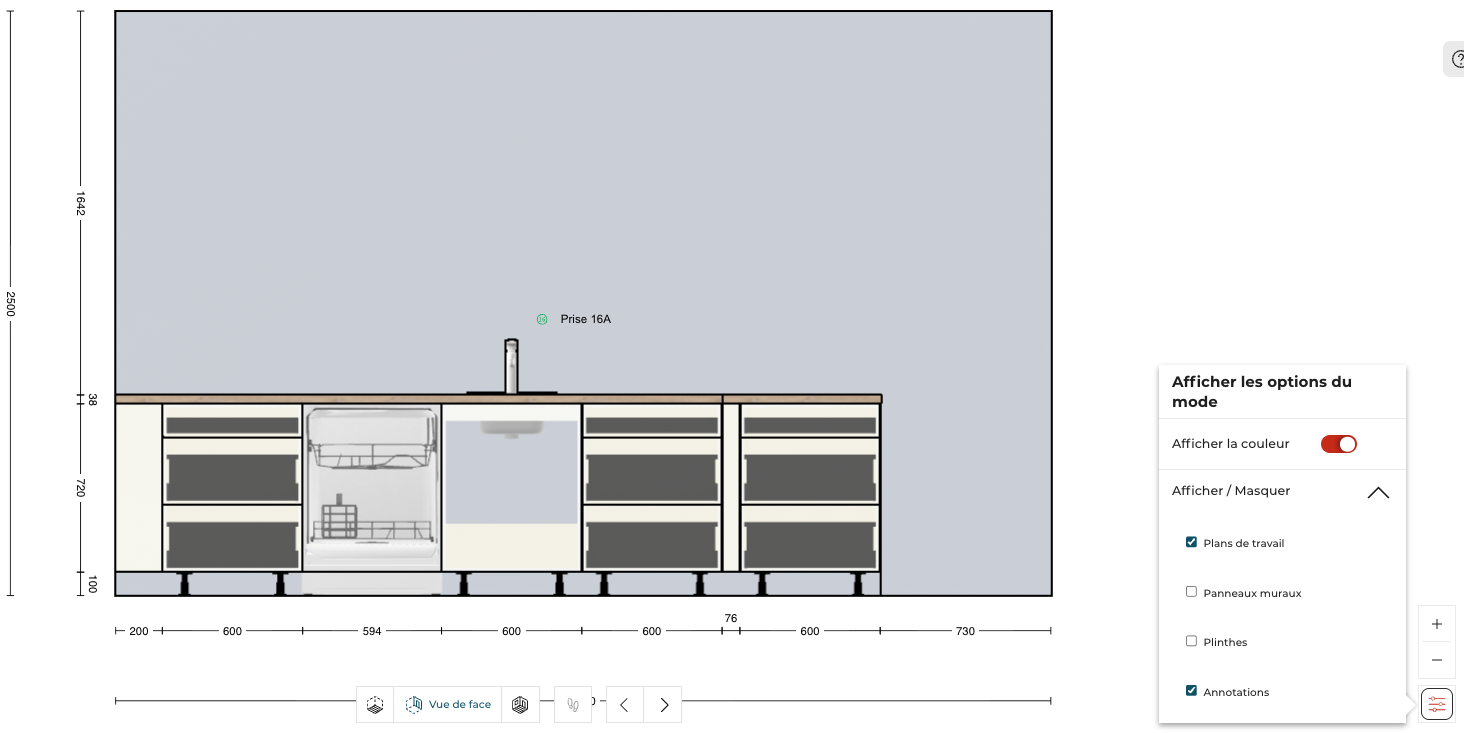
In Front Elevation view, the same layer management has been activated, the kitchen design can display or not any type of the products in order to do specific views for the client. In the example below, the kitchen designer decided to remove the display of the plinths.
Productivity
Improving the productivity of the Kitchen designers is essential to transform the customer's projects to real sells. To achieve this efficiency, several shortcuts have been added in the Kitchen application.
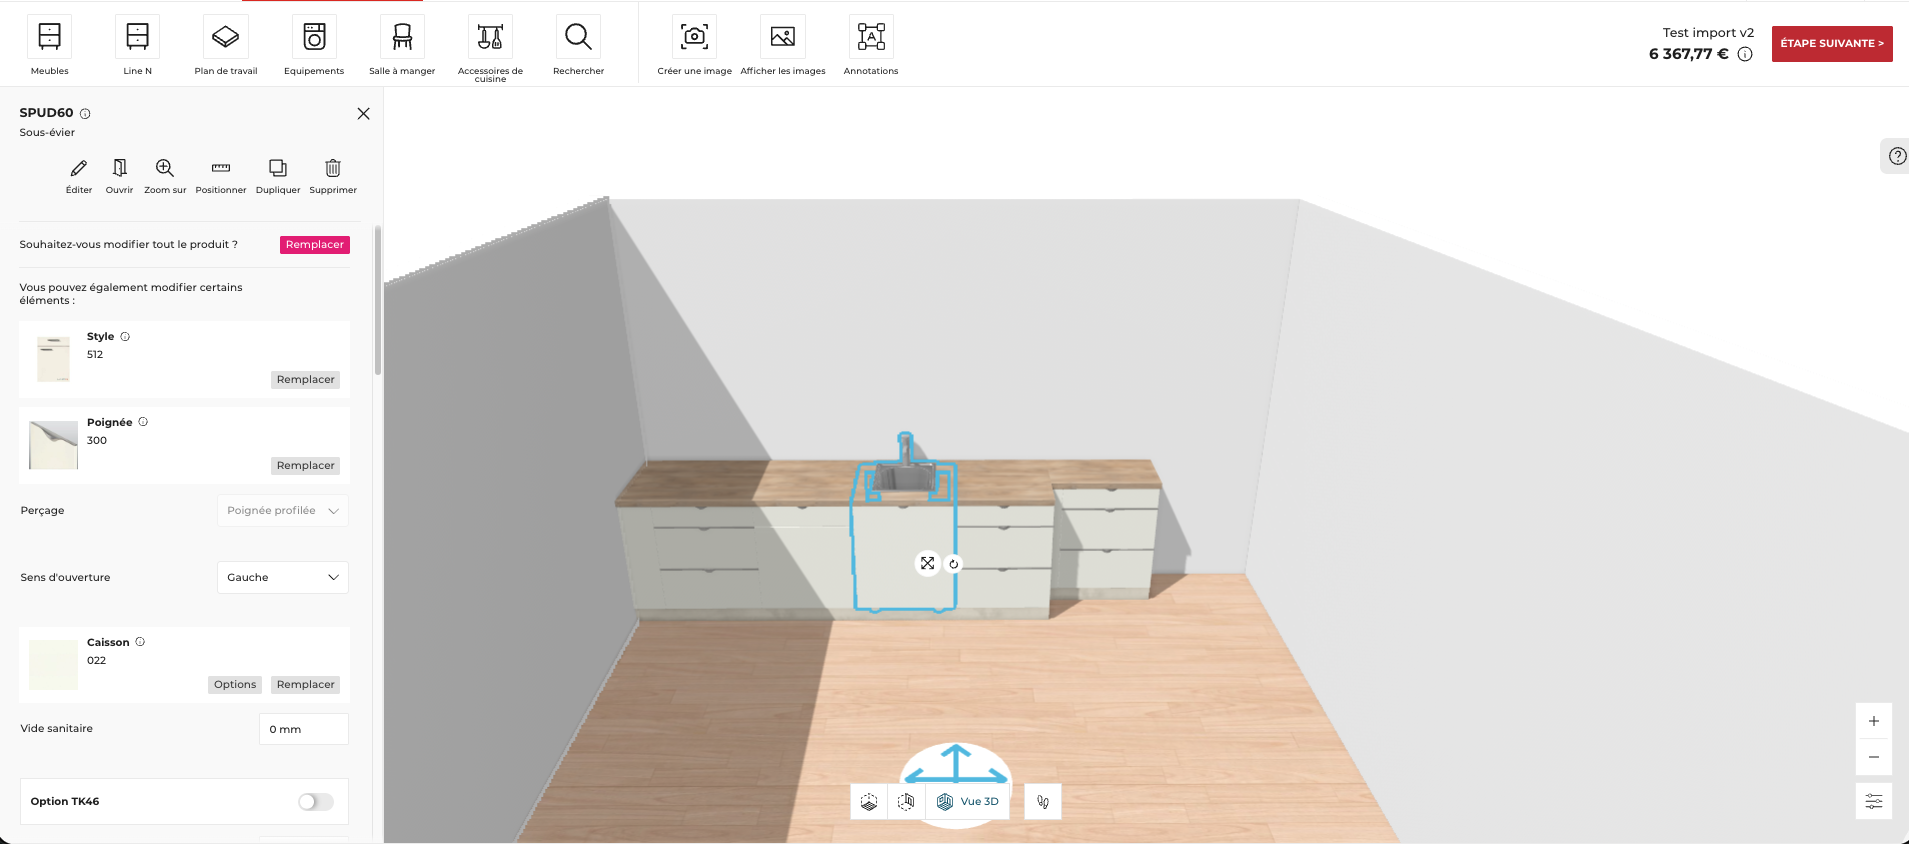
Edit panel direct access
To avoid multiple clicks and reduce the time to configure the products in the project, the Kitchen designer can access directly to the edit panel when the product is selected. The Kitchen designer has then all the information related to the configuration of the selected products.
Operators integration in input fields
To improve the productivity of the Kitchen designers, there is a possibility to directly enter the operators in the input fields in order to avoid to calculate manually with a calculator.
All the operators are managed in every location in the application like "+", "-", "/" and "*". The priority of the operations are also managed.
Example:


Shortcuts
Available soon
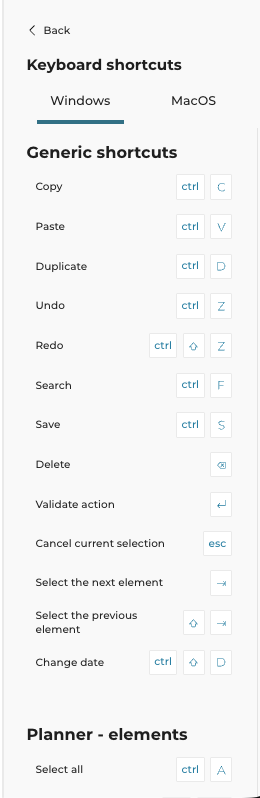
Lots of shortcuts have been added in the Kitchen application in order to allow the Kitchen designer to improve his/her efficiency. The users can retrieve all the available shortcuts by clicking in the help center through the section "Tooltips".

There are three sections of shortcuts we are currently covering in the Kitchen application:
- General shortcuts
- Planner elements
- Planner camera
Advanced annotations
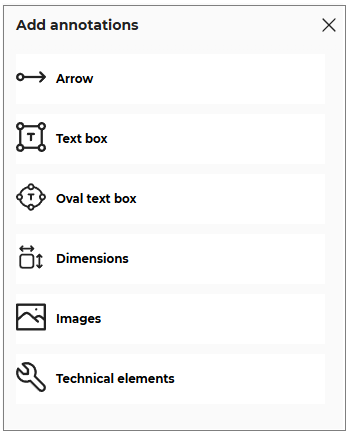
Kitchen designers can add annotations in the 2D view, the Front Elevation view and in the installation plan editor. We are proposing standard annotations like adding arrows, text boxes, images, symbols (technical elements) and dimensions.
To do so, the user needs to go into the views mentioned above and click the ![]() icon present in the top bar. The options to add the annotations are displayed, as shown below:
icon present in the top bar. The options to add the annotations are displayed, as shown below:
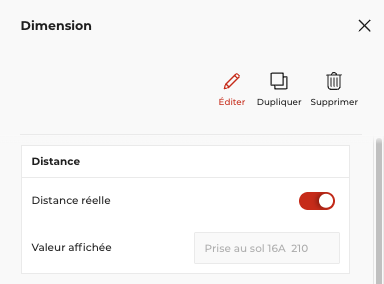
We are proposing an advanced feature for dimension annotation. The user can add any dimension by clicking on the concerned item and draw the dimension in the scene. There are several options for the edition of the dimensions. We added the possibility to override this dimension value as follows:
- Toggle OFF the Real distance option to enable the real distance option, as shown below:

- Select and modify the displayed value of the distance, as shown below:

- Click the Enter key or click outside the input box to save the modified distance.
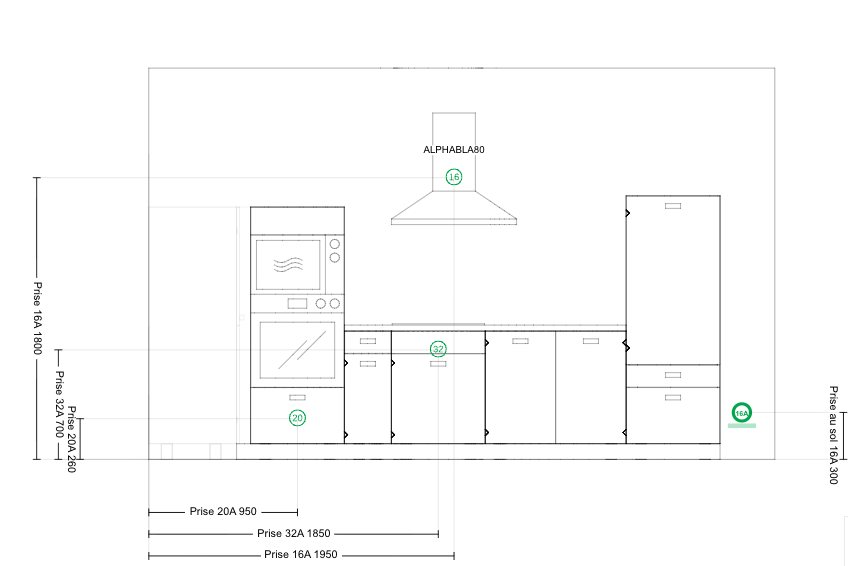
📌 The users can put any value they want such as a text, especially when the Kitchen designer wants to specify technical details such as plumbing, electrical item position, etc in the 2D Plans.
As the result, we are displaying this type of value directly in the wanted dimension:
Advanced 2D Plans
Kitchen Expert Suite enables the possibility to see the angles of the worktops in 2D Plans. In order to have a good readability, we propose to display only the non-perpendicular angles for the worktops products. If the angle is 90°, the angle symbol and its value is not displayed.
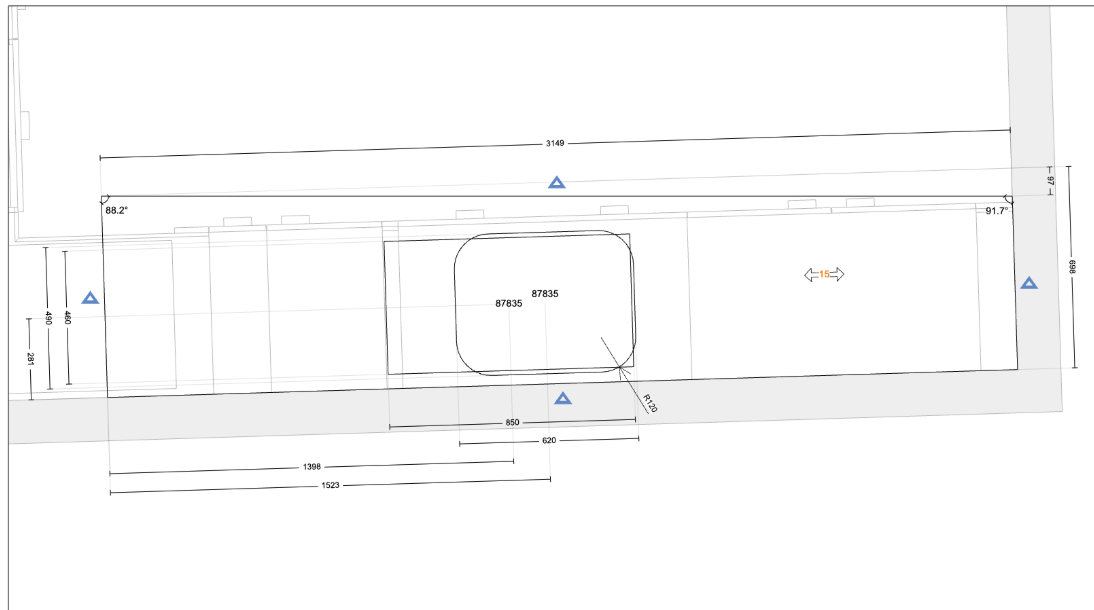
📌 To see the 2D Plans of the project, the users can go in the last step of the planner named "Finalize" step or by clicking on the "View images" button in the "Design" step.
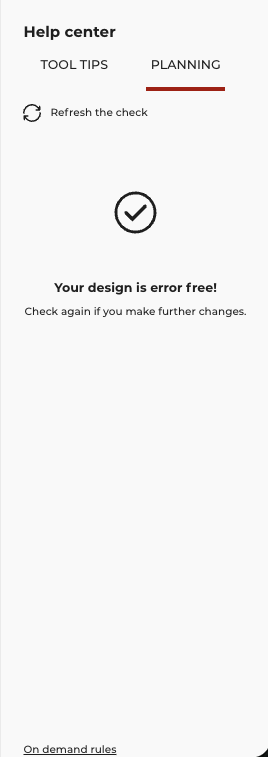
OnDemand Rules
Kitchen Expert Suite offer propose several rules to filter, replace or exclude some products or range of products in the application depending of the catalogs the Retailers subscribe.
This feature is available through the Help Center through a dedicated button present at the bottom of this panel.
For example, there is a possibility to replace the products from a specific range to another specific range of products. The user has to simply apply this rule by clicking to the dedicated "Apply" button.
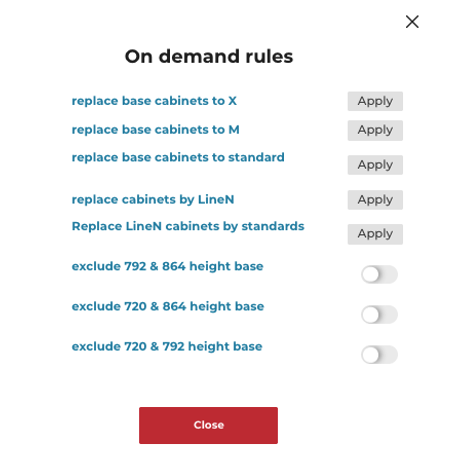
Another example is to exclude a range of products depending on some parameters. Note that this is an example and the retailers can filter, replace or exclude any products depending of their parameters.
The range maintainer has to activate the onDemand Rules and set the dedicated overloads to see the correct results in the application.
📌 Please refer to the dedicated documentation for the following onDemand Rules Catalog Product Filtering and Product Replacement for more details.
Product Filters for Multi-Range
Overview
In Kitchen Expert Suite, manufacturer catalogs managed by the 3DVIA Data Content team can be shared across multiple retailers.
Because each retailer sells only part of a manufacturer catalog, each retailer can configure product filters on its Range Custom. These filters control which products are visible in the planner and in the catalog.
Concepts
- Manufacturer Range: complete catalog delivered by a manufacturer.
- Range Custom: retailer-specific configuration of a Manufacturer Range.
Each Range Custom can define its own filters, so different retailers can expose different subsets of the same manufacturer catalog.
Typical use cases:
- Hide products not sold by the retailer.
- Remove duplicated items across multiple ranges.
- Restrict specific categories or subcategories.
Filter Types
- Include filter: defines products that are explicitly allowed. When present, only matching products are available.
- Exclude filter: defines products that are explicitly hidden.
Filter evaluation order:
- Apply Include filter.
- Apply Exclude filter.
If a product appears in both filters, the Exclude filter takes priority.
Behavior by configuration:
- No Include and no Exclude: all products are available.
- Include only: only included products are available.
- Exclude only: all products except excluded ones are available.
- Include and Exclude: included products minus excluded products are available.
API Access
Product filter configuration can be accessed through the Range Custom APIs.
Retrieve Configuration
GET /rangeCustoms/{id}
Returns the full Range Custom configuration including metadata, range reference, and product filter settings.
Update Product Filters
PUT /rangeCustoms/{id}
Use this API to update the Range Custom configuration.
Product filters are defined under productsFilter and support two rule types:
- Include filter – Defines products allowed in the catalog. When used, only matching products are available.
- Exclude filter – Defines products hidden from the catalog. If a product appears in both include and exclude lists, exclusion takes priority.
Each filter supports three selection modes:
productIDs: specific product identifiers.freeTags: products selected by free tags.closedTagsIDs: products selected by closed tags.
Example payload:
{
  "productsFilter": {
    "includeProducts": {
      "productIDs": ["Worktop_A", "Worktop_B"],
      "freeTags": ["premium"],
      "closedTagsIDs": [445] // plinth
    },
    "excludeProducts": {
      "productIDs": ["Faucet_A"],
      "freeTags": ["front"],
      "closedTagsIDs": []
    }
  }
}