Editing Cover Panel

To hide the cabinet frame the customer can add cover panels on the sides, knowing that:
- Base cabinets support back and side cover panels;
- High cabinets support back, top, and side cover panels;
- Wall cabinets support top, bottom and side cover panels;
- Corner cabinets support side cover panels.
📌 Side and back cover panels are automatically deleted when they are not visible: the side is in contact with the wall or adjacent with another cabinet.
Any modification on cover panels must be prepared beforehand by the Range Manager to ensure the expected behavior.
➡️ See Set Up Cover Panels 🔗 or Set Up Cover Panels through API 🔗 for detailed information on this preparating work.
Basic Actions and Options
The basic actions regarding cover panels are available by clicking the cabinet on the scene and then the Edit icon. They allow the customer to add cover panels on each side and then edit them.
Add a Cover Panel
⚙️ Set up: Dimension parameters on the product, '[side]CoverOption' or '[side]CoverPanel parameters on the cabinet
Cover panels are activated by default on cabinets if there destination side is visible.
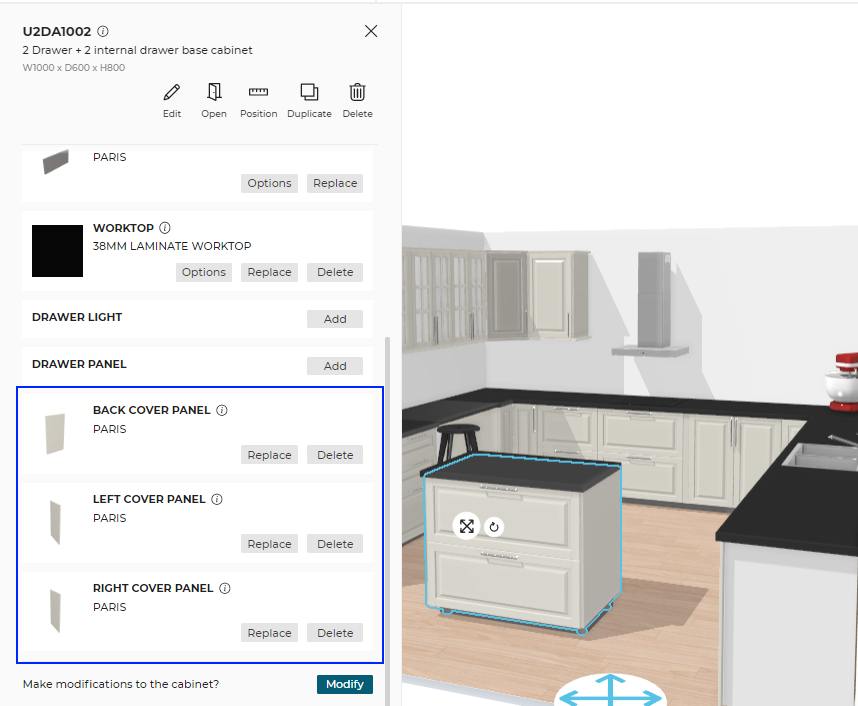
All Sides are Visible
On the illustration below, the base cabinet is place as an island in the room and no side is in contact to a wall. Thus, all the possible cover panels are listed in the Edit panel.
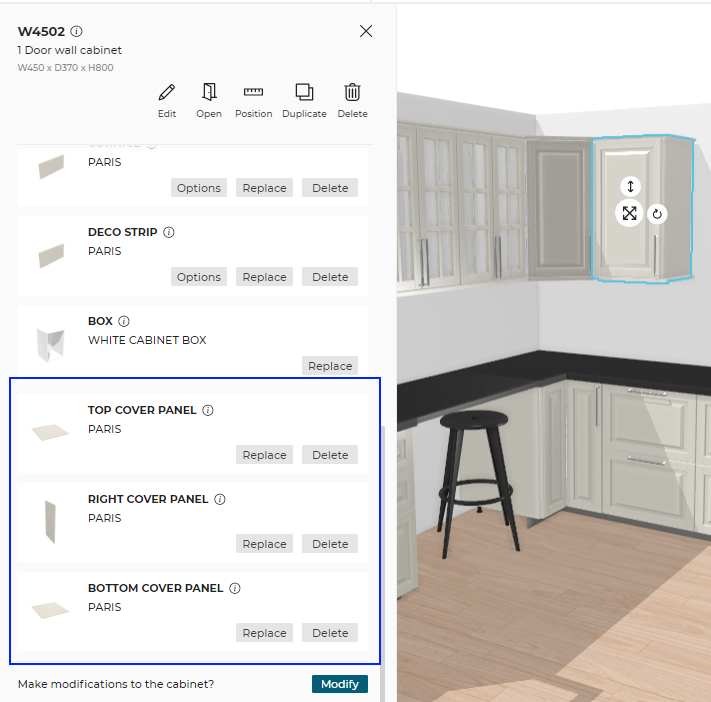
Adjacent Cabinet on one Side
On the illustration below, the wall cabinet is adjacent with a corner wall cabinet on the left.
Thus, the left side panel is not available.
Automatic Cover Panel
When adding a cabinet to the planner, automatic left and right cover panel are added to the cabinet, as shown below:
To activate/deactivate the automatic cover panels on the left and/or on the right side, click the toggle ON/OFF option.
For more information, please refer Parameters for automatic cover panels 🔗.
- If the cover panel is automatic, then depending upon the current kitchen style the panel is added or removed automatically.
- If a cover panel in automatic mode is deleted manually, the cover panel is removed from the planner. This means that the panel will no longer be displayed.
- The cover panel can be manually added after the automatic cover panel has been toggled off.
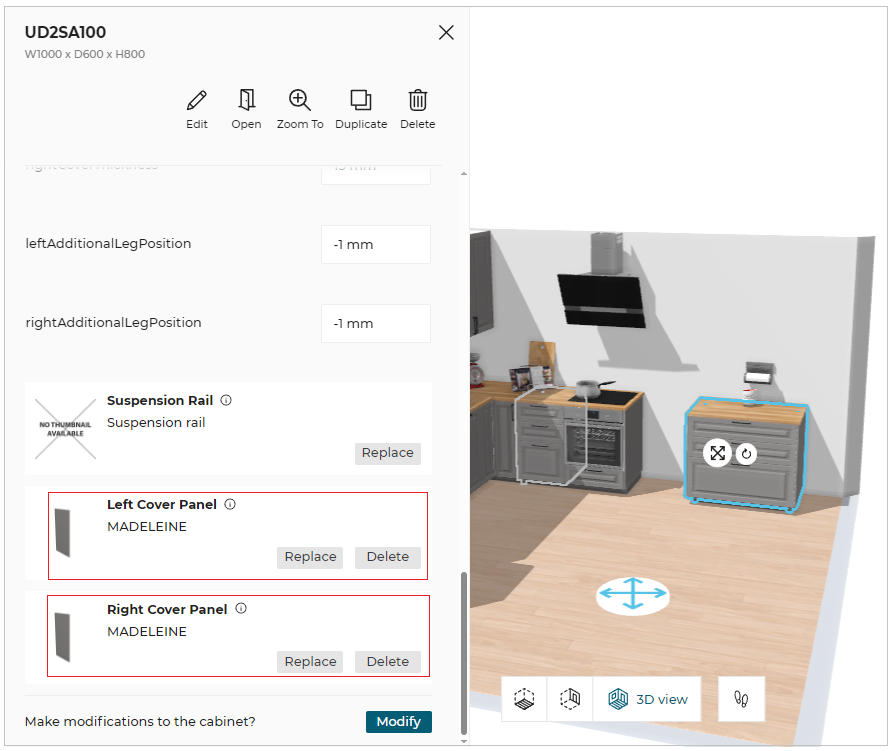
Replace a Cover Panel
Each cover panel on a cabinet can be edited independently from the others. This means that the customer can apply different covers panel products (having different colors or materials) to the cover panels of a same cabinet.
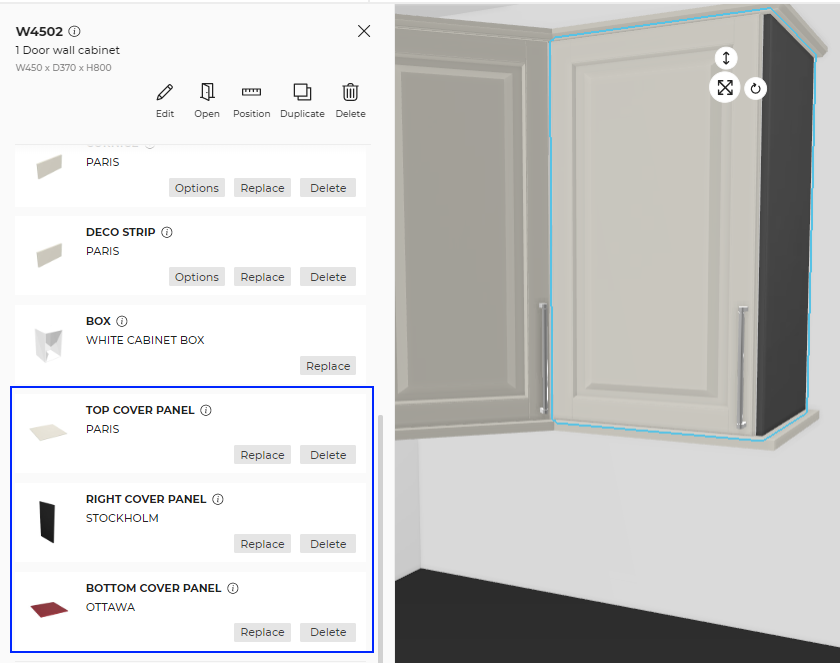
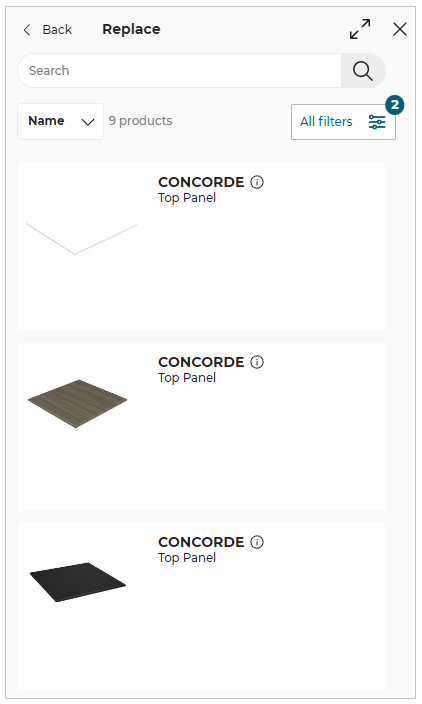
Click the Replace option, the catalog is displayed as shown below:
The applied cover panel material is highlighted at the top of the catalog.
For a high cabinet, the cover panel covers the whole side from bottom to top and not only the visible parts.
Delete a Cover Panel
Even if all the possible cover panels are automatically added to the cabinet when it is placed on the scene, the customer has the possibility to manually remove each cover panel independently.

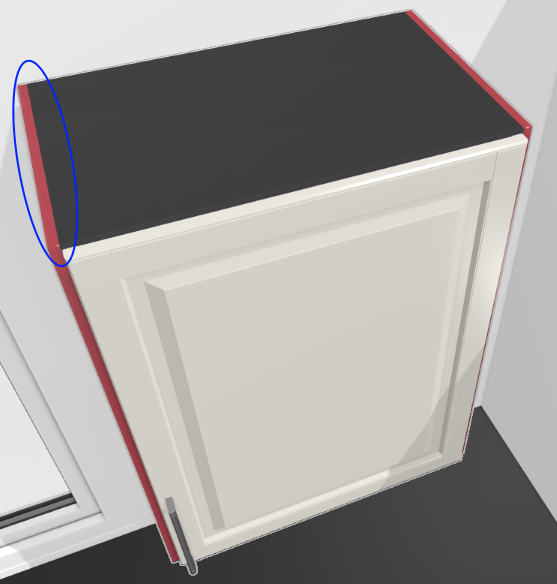
Specificity of Wall Cabinets
When a bottom or a top cover panel is activated on a wall cabinet, it is possible to extend the side panels to align with the edges of the top/bottom cover panels. This requires a specific assembly configuration and is not possible if a cornice or a deco strip are activated.
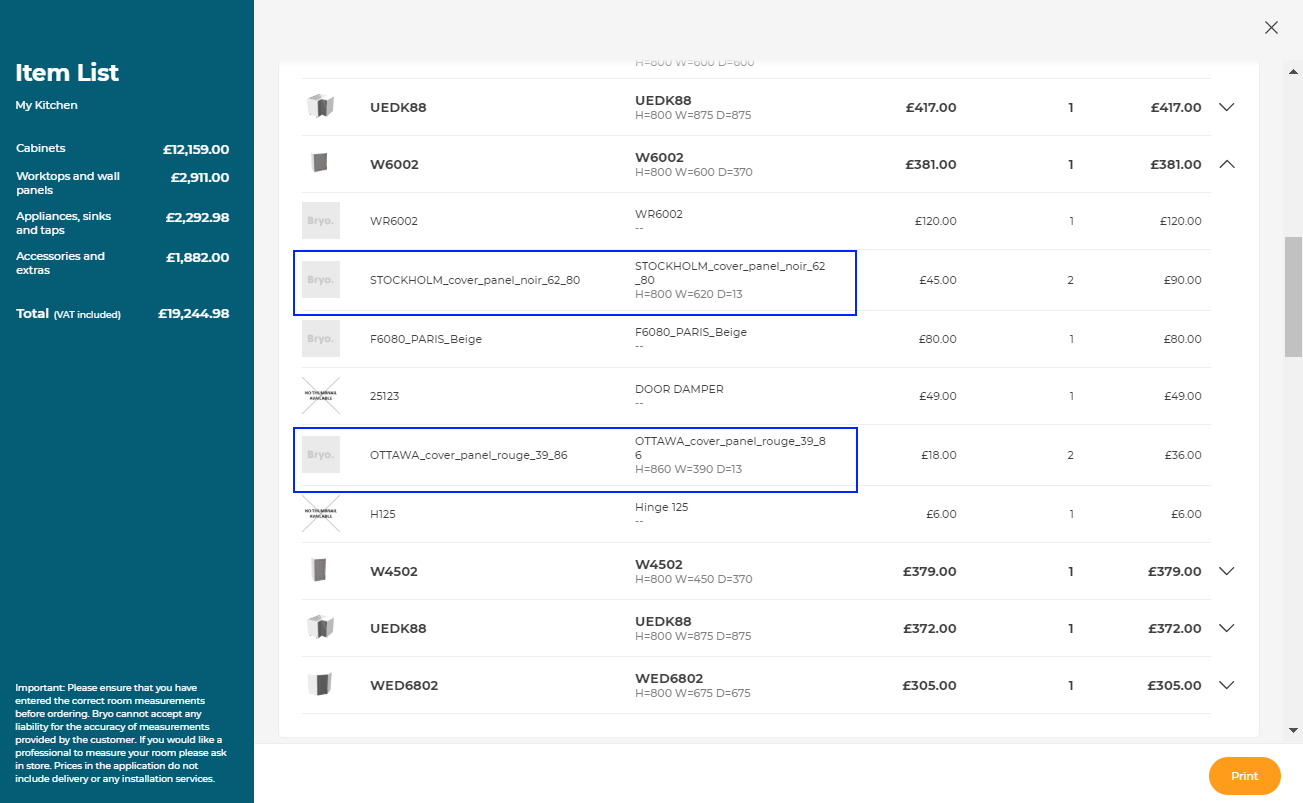
Possible Result in the Item List
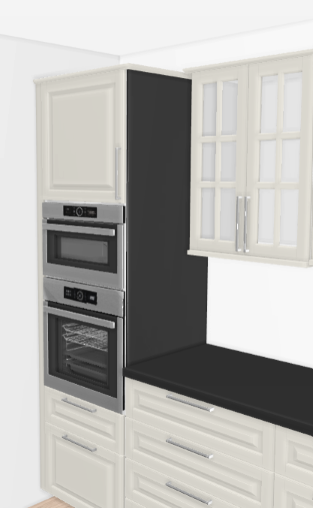
Like all the illustrations in this page, this is a BRYO sample
Depending on the customer's choices all products are priced separately and visible in the item list. The illustration below shows for example a wall cabinet with two different cover panels products.