Editing Wall Panel
In the kitchen planner, base and corner cabinets can be enhanced with a wall panel if their back side is in contact with the wall. They are not added automatically to the cabinet, conversely to worktops.
Wall panel options are editable by the customer via the Eedit panel of the cabinet: s/he can choose another wall panel, change it height, switch front to back side in case of reversible wall panels, define cut-outs and various operations.
All these modifications must be prepared beforehand by the Range Manager to ensure the expected behavior of the wall panel.
➡️ See Set Up Wall Panels 🔗 or Set Up Wall Panels through API 🔗 for detailed information on this preparating work.
➡️ See Define Wall Panel Position 🔗 for detailed information on how to place a wall panel on a cabinet.
Basic Actions and Options
The basic actions regarding wall panels are available on the scene and via the Edit panel. They allow the customer to add a wall panel and then edit it.
Add a Wall Panel
⚙️ Set up: Material parameter(s), 'wallPanelType' parameter
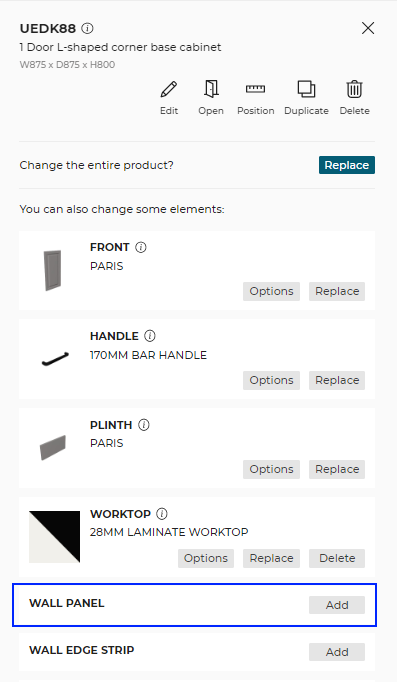
Cabinets do not have predefined wall panels. To add a wall panel, the customer selects the cabinet on the scene and clicks the Edit icon. Then, s/he clicks the Add button in the Wall panel section to add a wall panel.
Each product has its own material and so its own texture, but some can have two different materials if they are reversible. By choosing the product, the customer also chooses the type of the panel from precut to custom panel.
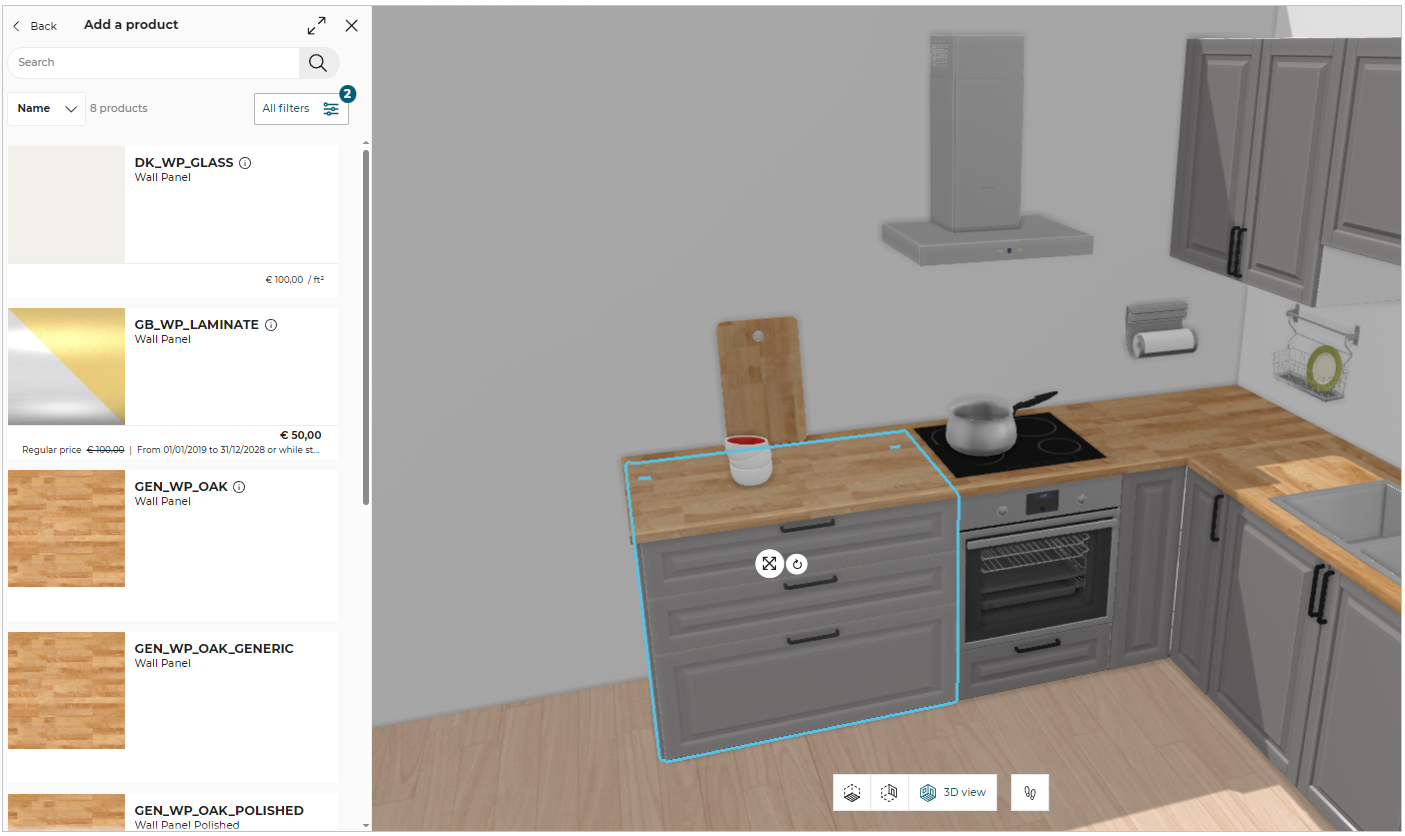
Options to add wall panel to the cabinet:
Click the Add button from the edit panel.
Select the required wall panel from the catalog and choose between Apply to the selected linear or Apply option to add the wall panel.
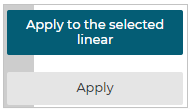
Apply to the selected linear: It changes the feature for the selected linear.
Apply: It changes the feature for the selected cabinet.
Replace the Wall Panel
⚙️ Set up: Application distribution parameter resetCustomizedLinear 🔗. If set to 'false', the modifications such as edge cut, cut-out etc. done on wall panel are kept after replacing it with another one. Its default value is set to 'true' to delete the modifications after replace.
- Select the cabinet for which you want to replace the wall panel, the edit panel is displayed, as shown below:

- Click the Edit button, the edit properties are displayed, as shown below:
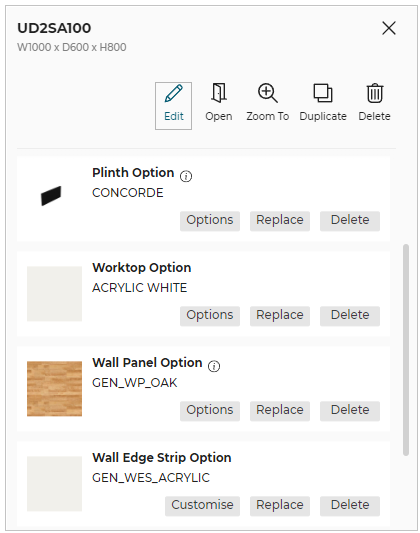
- Click the Replace button, the replace catalog displayed,as shown below:
The applied wall panel material is highlighted at the top of the catalog.
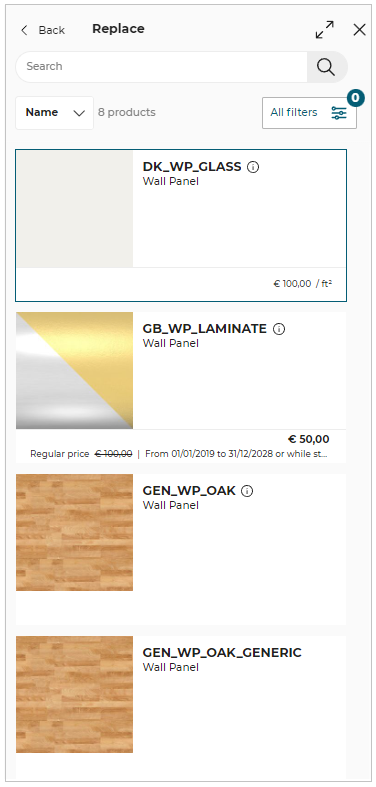
- Click the desired wall panel from the list in catalog.
Options for Replace:
Apply to the selected linear: It changes the feature for the selected linear.
Apply: It changes the feature for the selected cabinet.
Replacing the Custom Wall Panel
To replace the custom Wall Panel:
Select the cabinet and click the Edit option.
Click the Replace button from the Wall Panel option, the list of Wall Panel material available in the catalog is displayed.
Select the Wall Panel material to replace the Wall Panel of the selected cabinet.
The window to notify that the non-compatible options have been removed is displayed, as shown below:
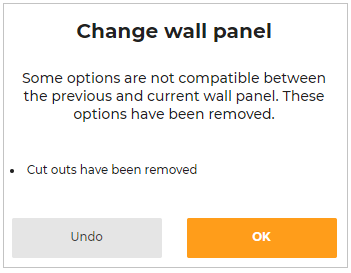
To discard the changes and keep the previous Wall Panel, click the Undo button.
Default Position
⚙️ Set up: 'wallPanelOption' parameter on the cabinet
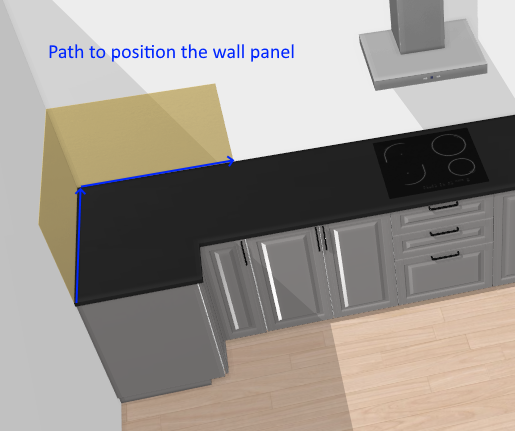
By default, the wall panel is automatically generated at the intersection between the cabinet worktop and the wall. If the back of the cabinet is not in contact with a wall the wall panel cannot be generated. The wall panel is generated along the outter path 🔗 defined on the cabinet for the worktop.
Dimension and Rail
⚙️ Set up: Dimension parameters, 'rail' and 'railProductID' parameters
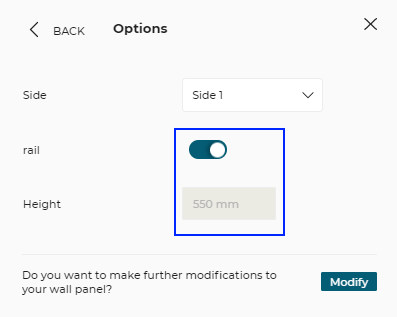
For wall panels without rail, the height dimension is free by default and editable in the options of the wall panel.
Some panels have default and precut fixation rails. If used, these rails define a default panel dimension that is not editable by the customer. The customer can choose to deactivate the rail to be able to edit the dimension of the wall panel. When deactivated, the rail is removed from item list and from total price calculation.
Reversible Wall Panels
⚙️ Set up: 'side' parameter, material parameters
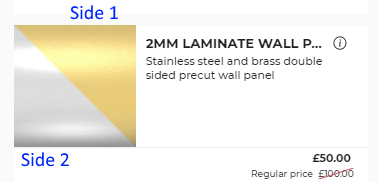
Reversible panels are double-sided panels for which two materials have been defined: one material for the front side and another for the back side. The customer can switch from front to back side by selecting 2 in the Side drop-down list. By default, the visible side is 1 which is the front side.
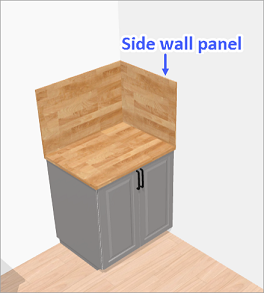
Side Wall Panels
⚙️ Set up: 'leftWallPanel' and 'rightWallPanel' parameter
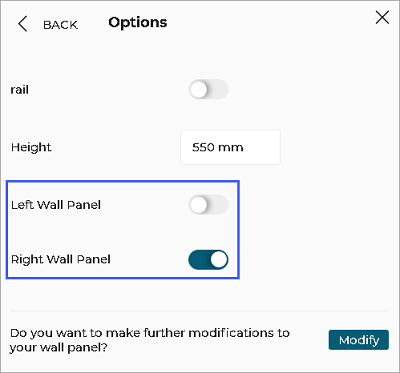
Wall panel can be added to the side wall of the base cabinet. It can be right wall, left wall or both the walls next to base cabinet. These wall panels are enabled by selecting Left Wall Panel and Right Wall Panel.
By default, the side wall panels are deactivated.
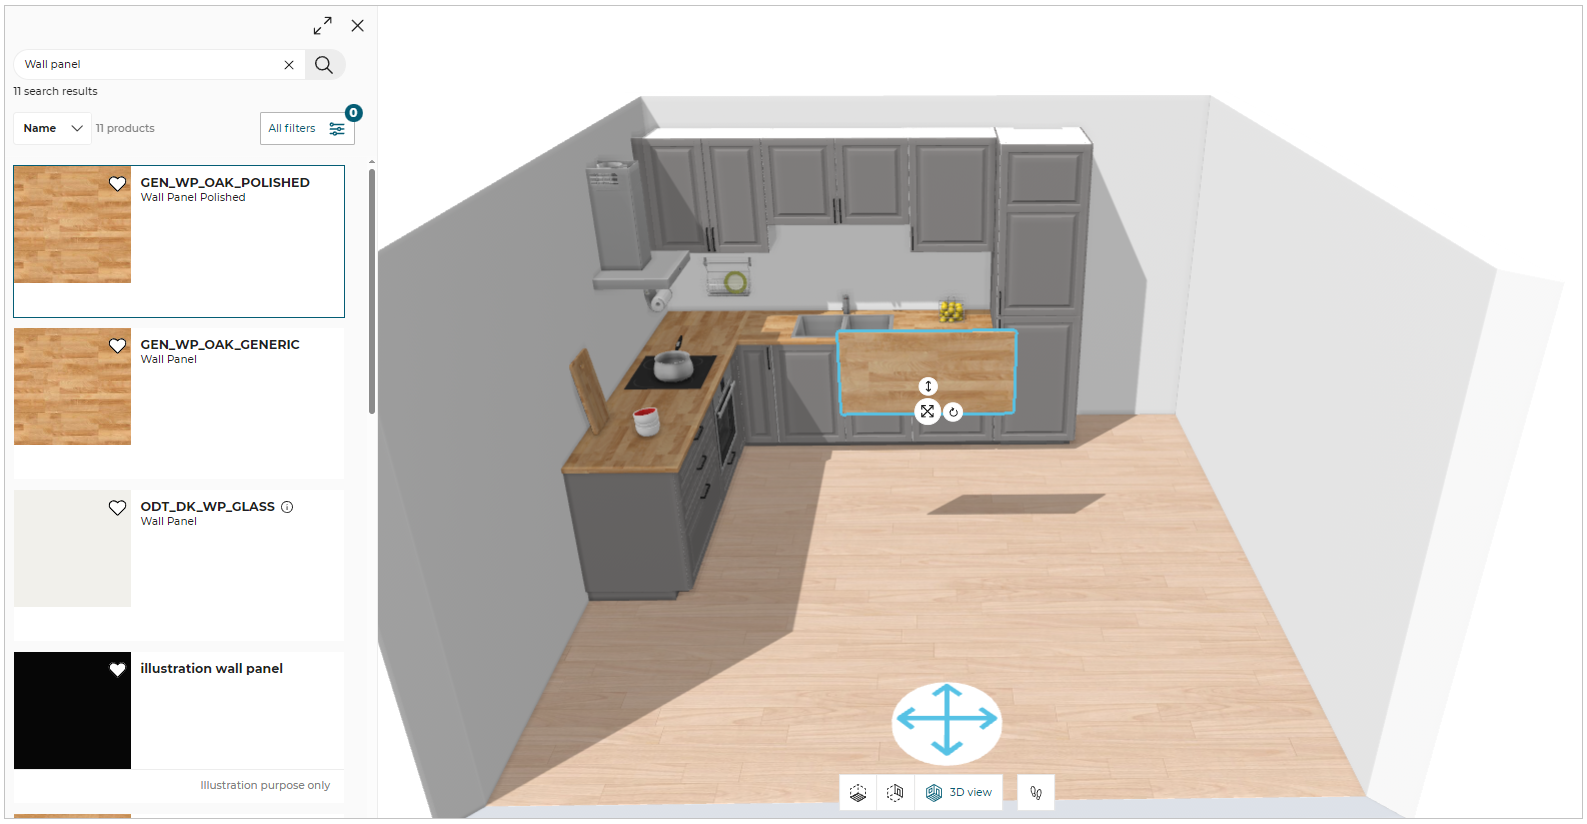
Freestanding Wall panels
⚙️ Set up: Dimension parameters defaultAltitude 🔗.
You can add a freestanding wall panel using the Search option.
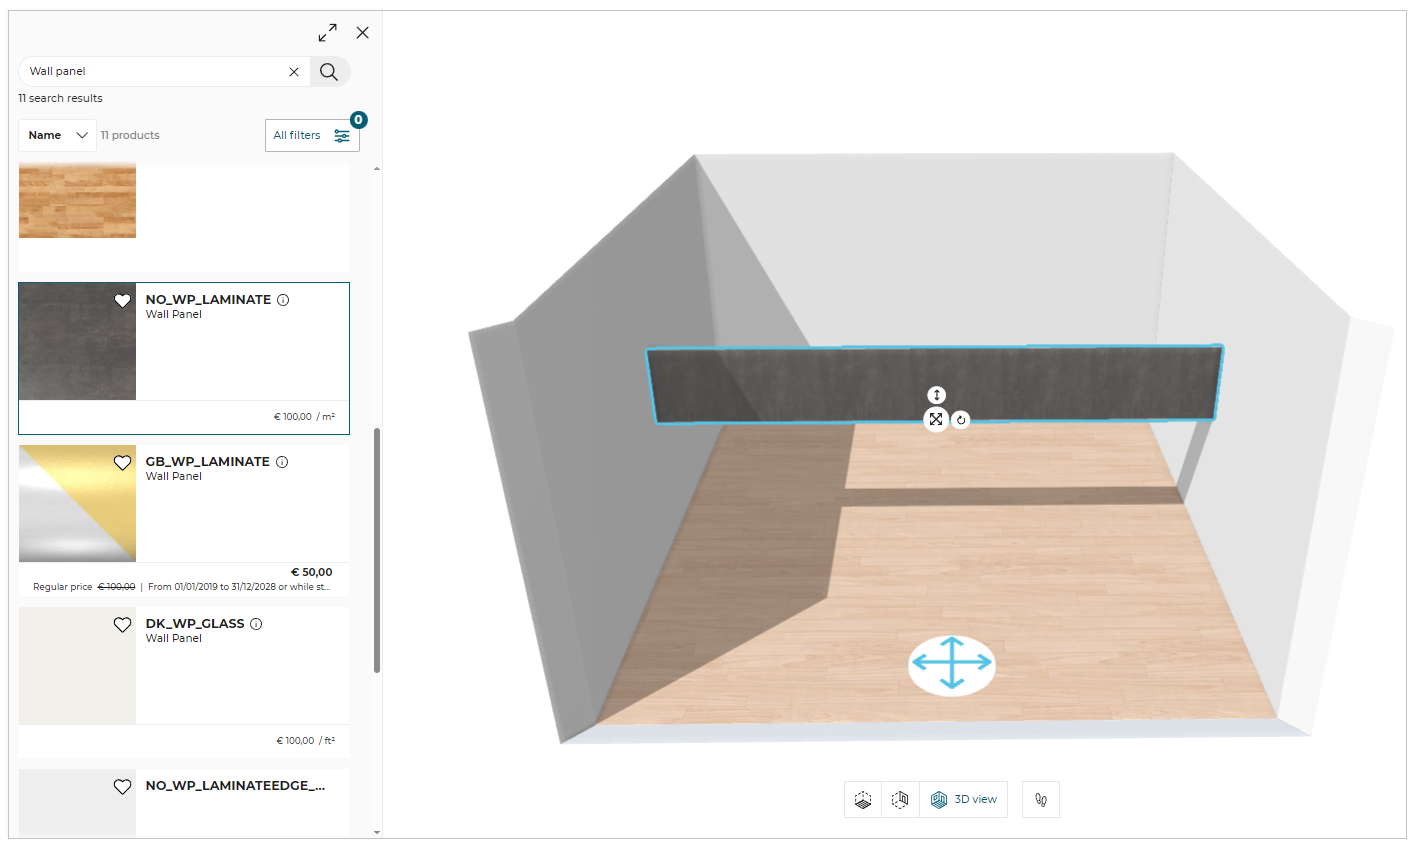
If a freestanding wall panel is added to a room, it is possible to manipulate and move the position of the added wall panel.
It can be moved horizontally and vertically in the room as well as rotated about its axis.
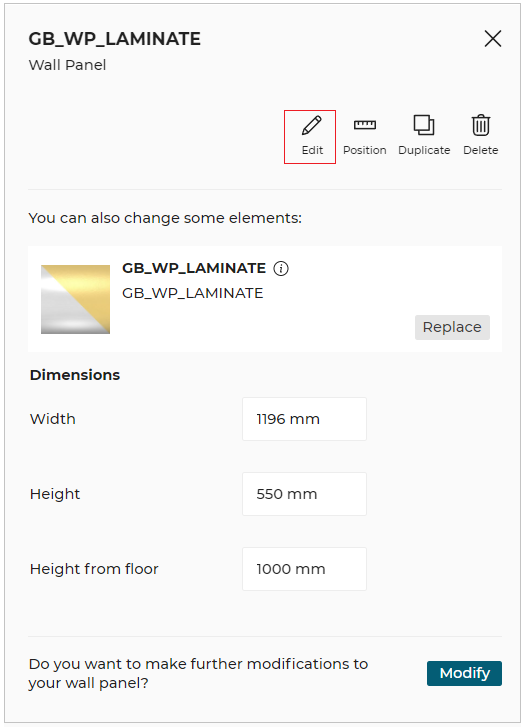
You can modify the Width, Height, and Height of the wall panel from the floor, as shown below:
- The duplicate wall panel is centrally positioned in the room. The orientation of the duplicate product is consistent with the existing product.
- You can also add the Freestanding wall panel to the room by drag and drop them from the catalog, as shown below:
Advanced Options via the Wall Panel Editor
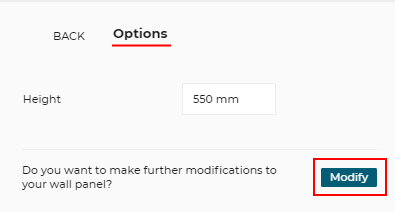
By clicking the Modify button from the wall panel Options the customer accesses the Wall Panel Editor.
To learn more about wall panels and its types, click Learn More about wall panels types available in confirmation pop-up.
Information for Wall Panel and Worktop types appear as shown below.
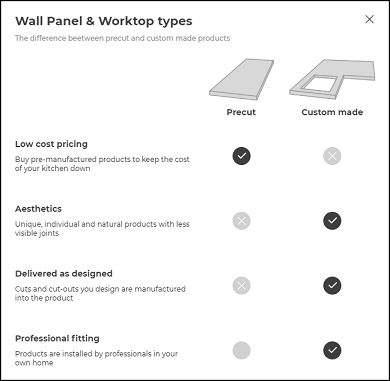
Wall Panel Types
Different wall panel types available in 2D view of the project:
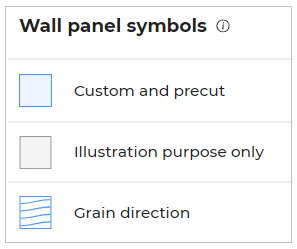
Wall panel types used in the kitchen are mentioned in the wall panel editor, after enabling Display legend in view mode options.
Illustration purpose Wall Panel:
Illustration wall panel is a wall panel, which user can use for illustration purpose only. This wall panel is available in gray color in the wall panel editor.
Custom and precut Wall Panel:
In custom wall panel, the joints, cuts, and cutouts need to be added by the user.
In precut wall panel, the joints, cuts, and cutouts may be present in the wall panel by default.
The Wall Panel Editor gives a 2D view of the project and allows the customer with:
- Change in wall panel dimensions
- Corner option for adding corner cut
- Edge options to:
- Add edge (triple) cuts
- Split wall panel
- Merge wall panels
- Define splits (joint) between two wall panels
- Split edge
- Add Edge Finish
- Wall panel options to:
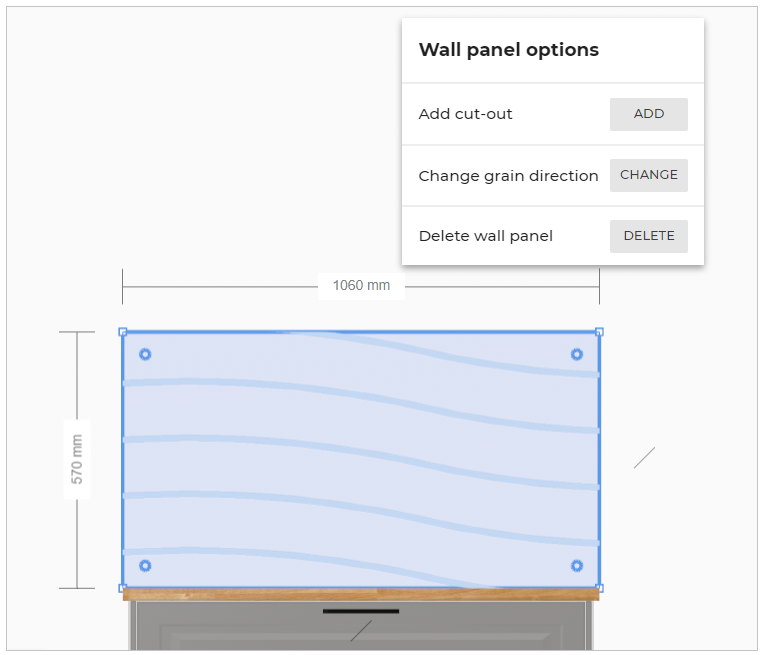
- Add cut out
- Change in grain direction
- Delete the wall panel
Change the Dimensions
⚙️ Set up: Application distribution parameter Dimension parameter🔗.
The customer will be able to change the dimensions of the wall panel either by moving the edges or by specifying the expected dimension values. These values cannot exceed those defined on the product.
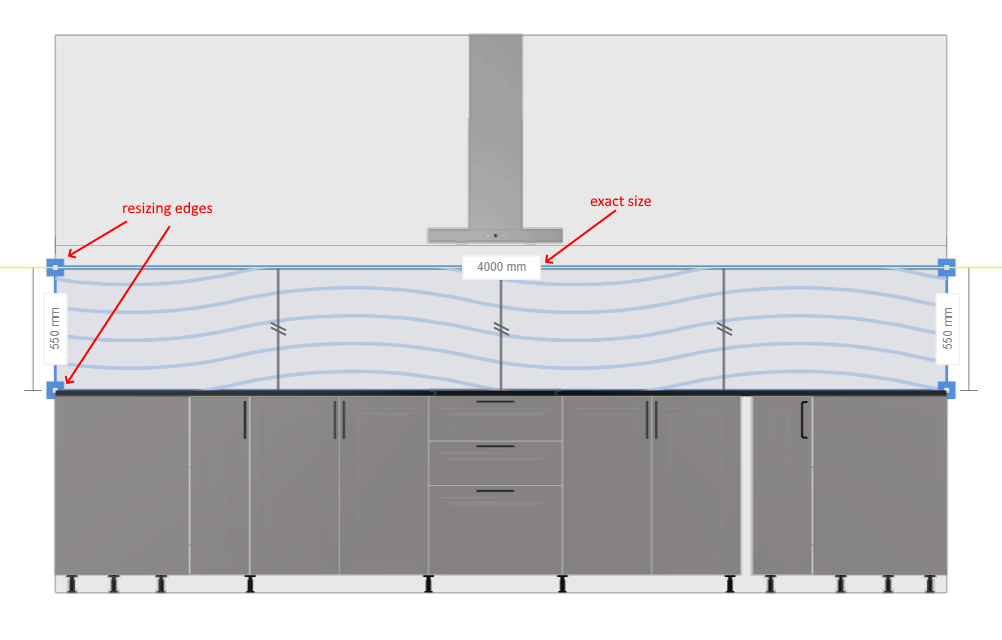
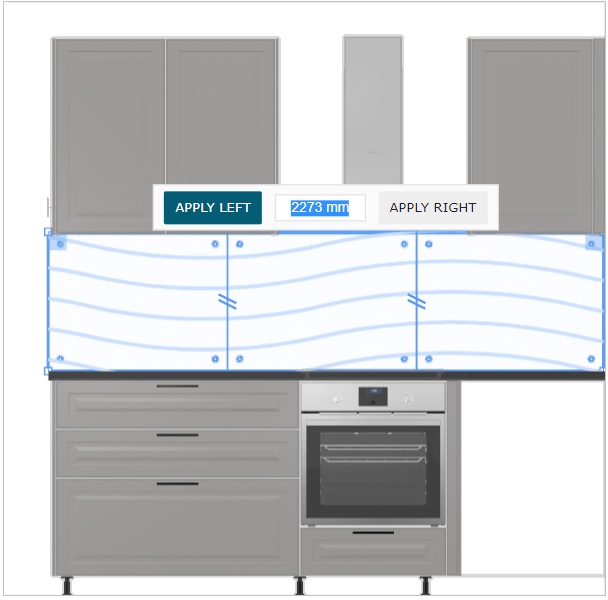
On clicking APPLY LEFT, the wall panel shall be adjusted laterally in the left.
On clicking APPLY RIGHT, the wall panel shall be adjusted laterally in the right.
On clicking APPLY BELOW, the wall panel shall be adjusted longitudinally in the below.
On clicking APPLY ABOVE, the wall panel shall be adjusted longitudinally in the above.
Note: If splits are between two collinear wall panel edges, no button is displayed.
Add a Corner Cut
⚙️ Set up: Parameters for operations 🔗
➡️ See also the Applicative Rules for Wall Panel Corner Cuts 🔗.
The customer can define a cut on a corner of the panel by selecting it.
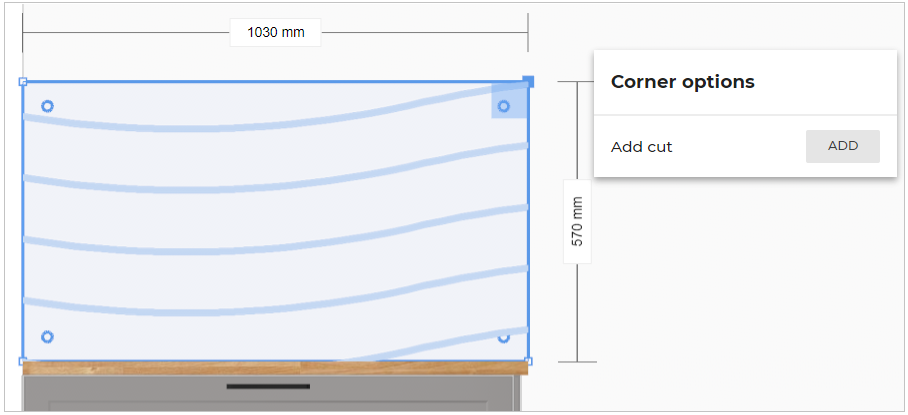
The corner cut can be single or a double cut. Then, the customer defines the shape, the position and the dimensions of the corner cut.
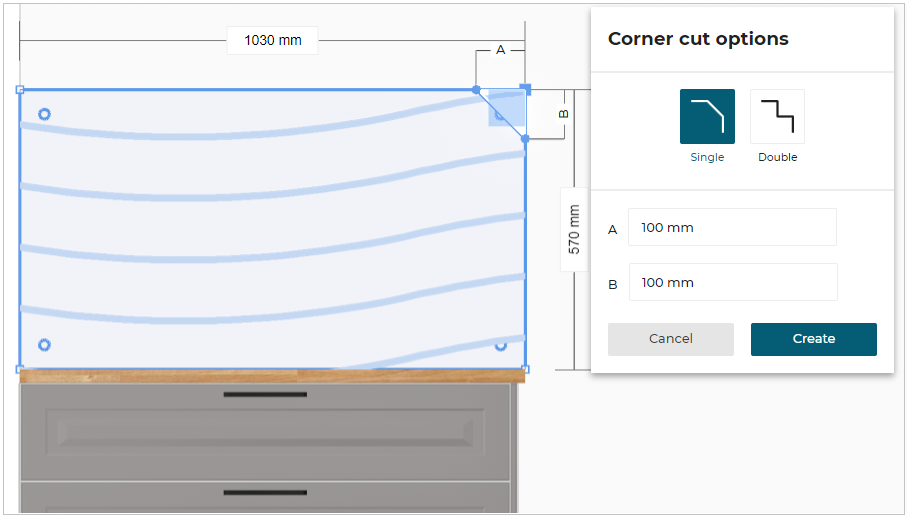
- If the vertex of the wallpanel is selected, then a square symbol showing perpendicular angle (i.e. 90 degree) is displayed, as shown above.
- If the edge of the wallpanel is selected, then the square symbol showing perpendicular angle is displayed on each corner of the edge.
For non-perpendicular sides, the angle values are not displayed.
Edge (Triple) Cut
Edge finishing is usually a triple cut but can be rounded too. The customer has to define the shape, the position and the dimensions of the cut.
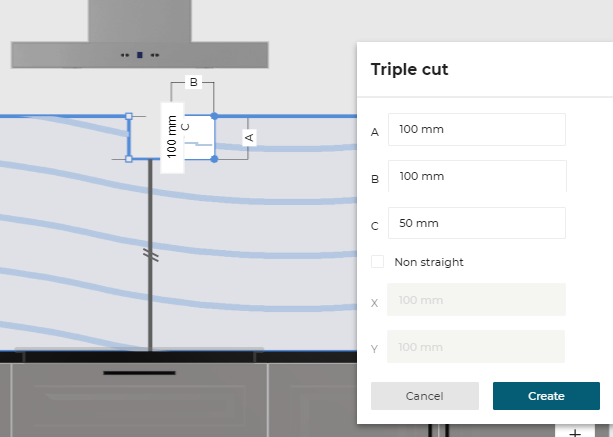
Split wall panel
To split the wall panel:
- Select the edge of the wall panel, the Edge options appears, as shown below:
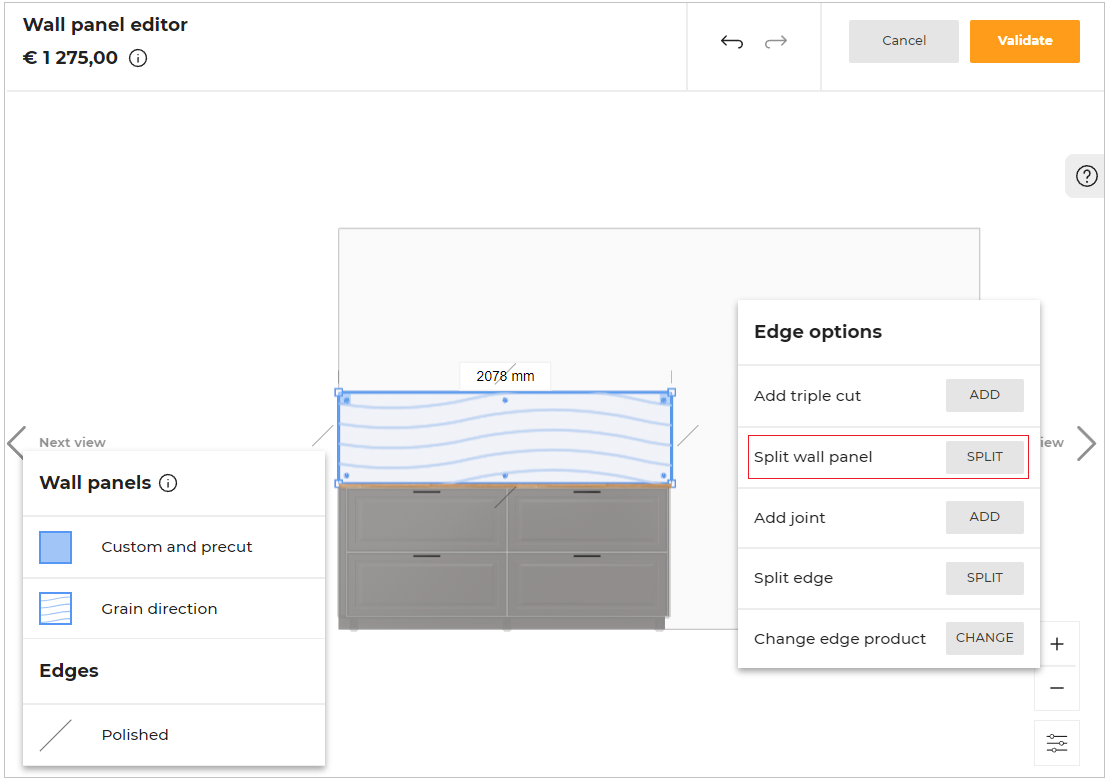
- Click the SPLIT button of the Split wall panel option.
The split wall panel is applied to the center of the selected edge, as shown below:
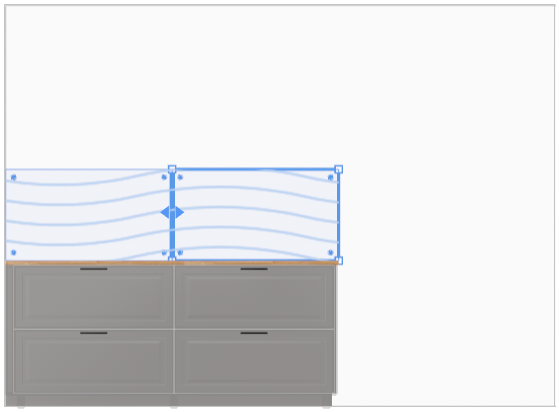
You can change the size of each wall panel by dragging the edge or modifying the dimensions of the edge.
Merge wall panels
To merge the splitted wall panels:
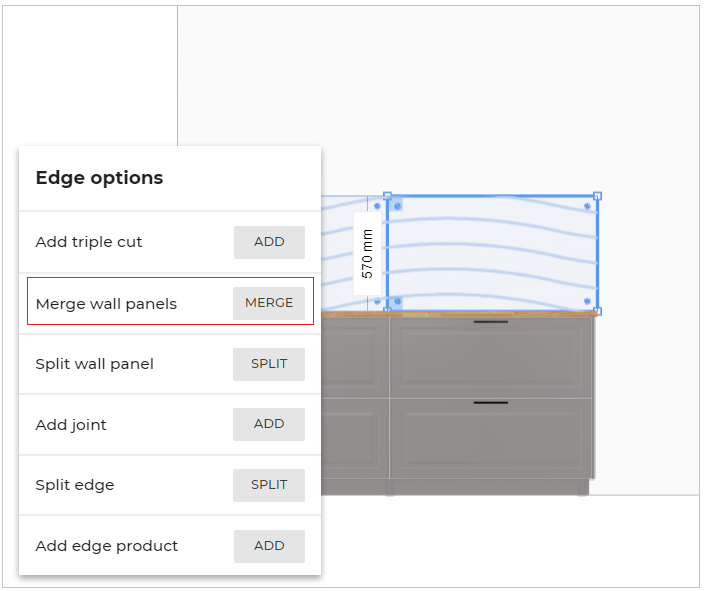
- Select the split wall panel edge, the Merge wall panels option is displayed, as shown below:
Split (Joint) Option
The customer will be able to add joint to the wall panel edge by selecting the "split" from split wall panel option.
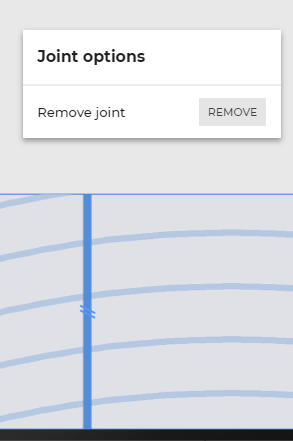
When the customer clicks a joint between two adjacent wall panels s/he can remove it.
Split Edge
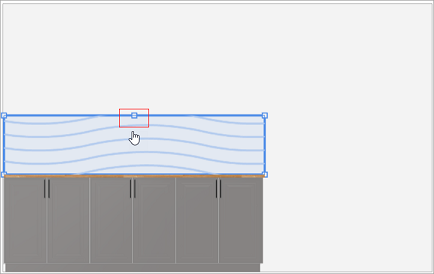
The customer will be able to add split to the wall panel edge by selecting the "split" from split edge option. This option splits the wall panel in two halves of equal length.
The customer can create multiple splits and perform operations accordingly.
See also the Applicative Rules for Wallpanel Split Edge 🔗
Add Edge Finish
⚙️ Set up: 'edgeCompatibility' and edge parameters : 'parallelToGrain' and 'perpendicularToGrain'
➡️ See also the Applicative Rule for Wall Panel Edge 🔗.
For custom type wall panels, the customer can choose the finishing of the left, right and/or top edge(s) of each wall panel. Different edge products have different symbols.
Based on the wall panel edge parameters:
a. perpendicularToGrain specifies the wall panel edge is applied perpendicular to the grain direction.
b. parallelToGrain specifies the wall panel edge is applied parallel to the grain direction, and
c. otherGrainDir specifies the wall panel edge is applied neither parallel nor perpendicular.
Edge Legend
The edge products and edge symbols are displayed in the Edges after enabling the Display legend in View mode options.
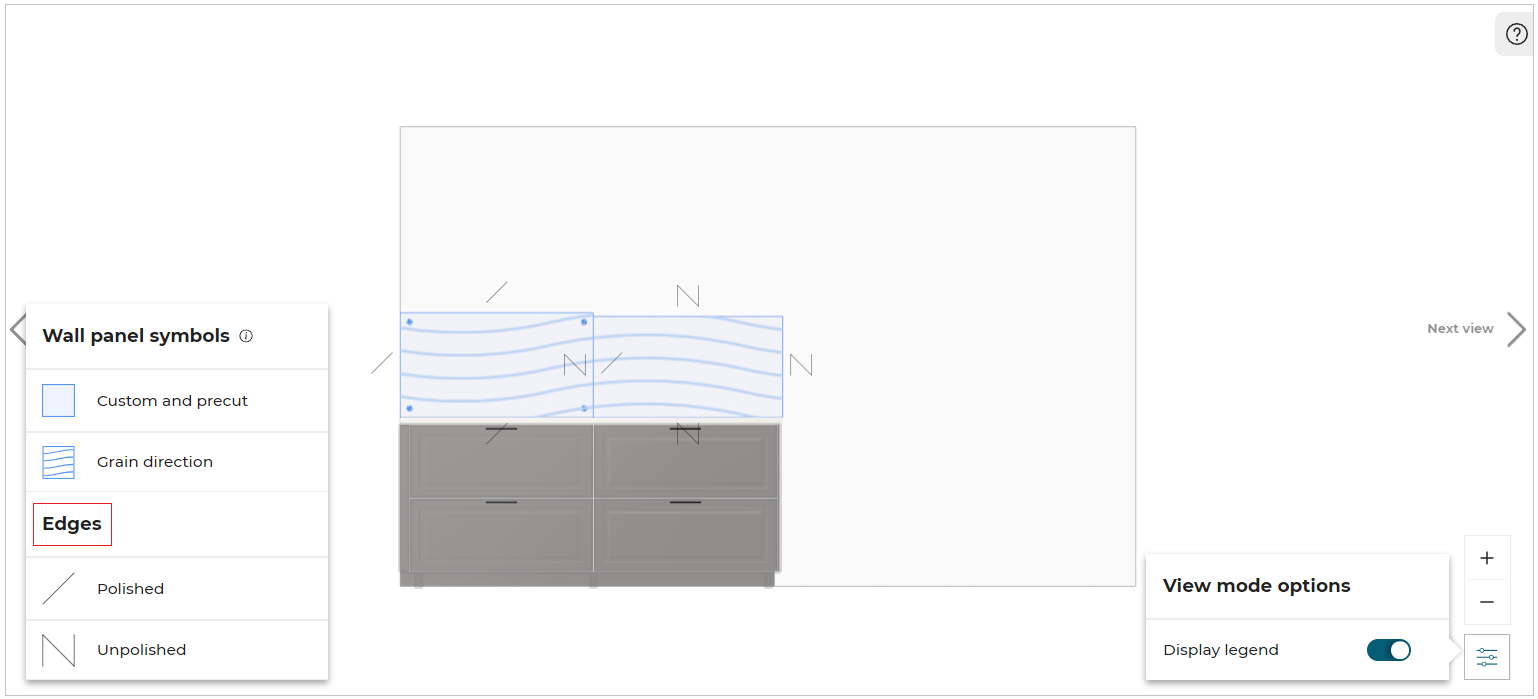
Conditions for Edge Legend:
- If Edge finishes can be set to a wall panel, only then legend and symbols are displayed. If not, the legend option is deactivated and cannot be activated.
- The legend displays only the symbols visible on the current wall panel.
- If an edge finish product does not have a symbol, it does not appear in the legend.
- If an edge finish product does not have a description, it appears in the legend, with an empty line.
- An edge finish product appears only once in the legend.
- If two edge finish have the same description, only one will appear in the legend.
Edge Products
In specific cases, the customer can add an edge finish product to the selected edge.
Compatible edge products are listed on wall panel product level via the 'edgeCompatibility' parameter.
To change or remove the edge product, click on the edge of the wall panel, Edge options window will appear as shown below:
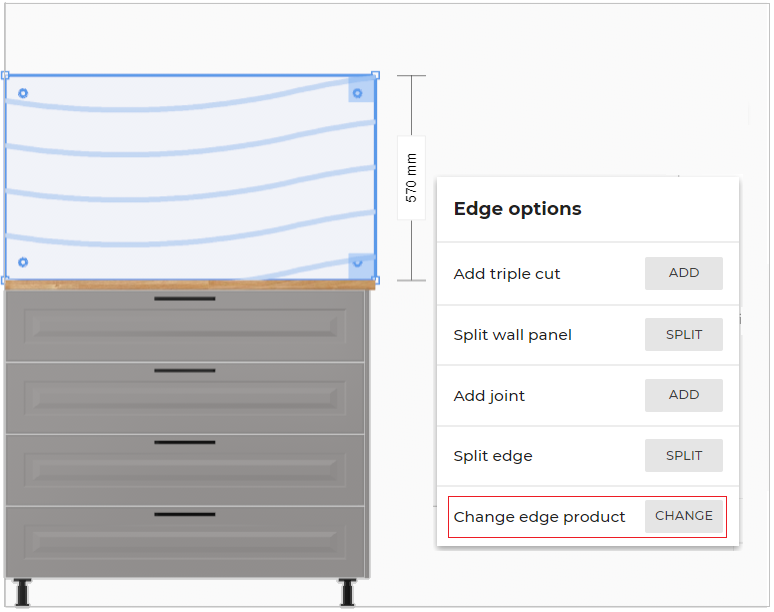
From the Edge Options window, click CHANGE to change the edge product.
You can choose the edge product from the drop down option of Choose a reference.
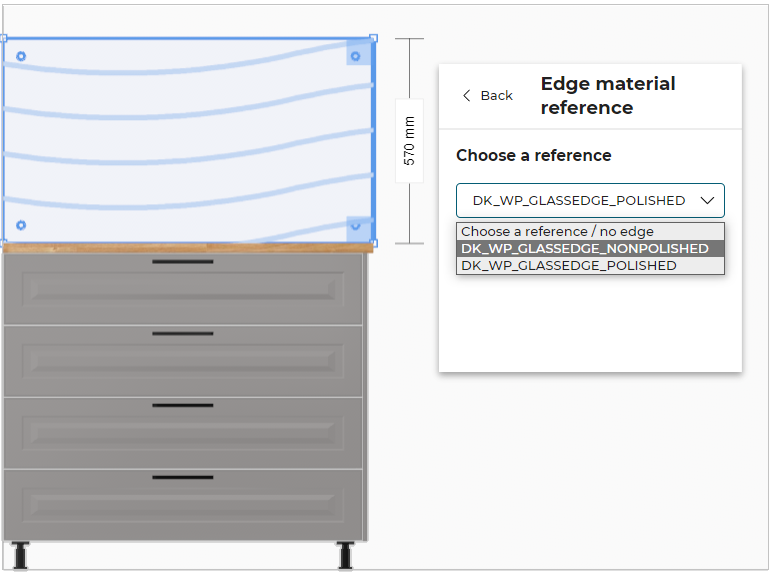 If you select Choose a reference/ No edge option, the edge product will be removed.
You can add edge product by selecting edge of the wall panel and click ADD from Add edge product option.
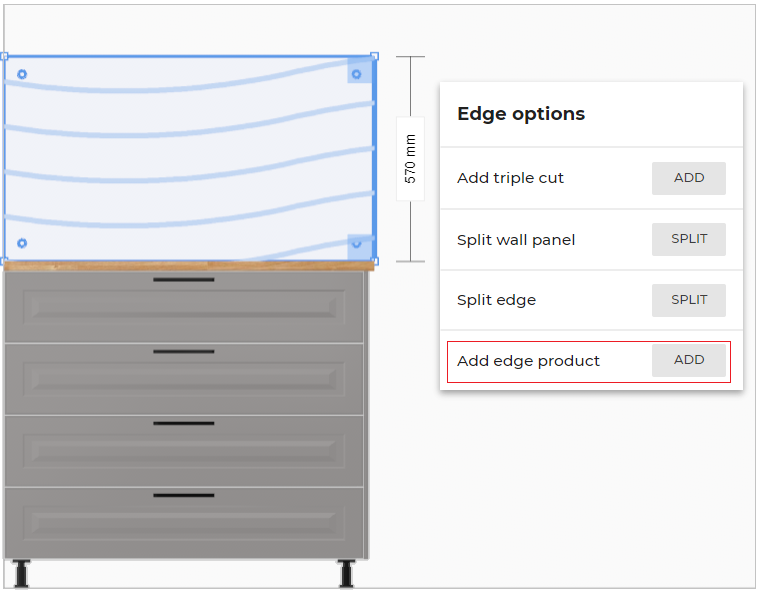
Wall panel options
Select the Wall panel in the Wall panel editor, the Wall panel options appear, as shown below:
Add a Cut-Out
⚙️ Set up: 'operationCompatibility' parameter
➡️ See also the Applicative Rules for Wall Panel Cut-Outs 🔗.
The customer can define a cut-out anywhere on a wall panel by clicking a position on the wall panel. Cut-outs can be either rectangular or circular. Then, s/he defines the shape, the position and the dimensions of the cut-out. This is an illustration of a rectangular cut-out definition.
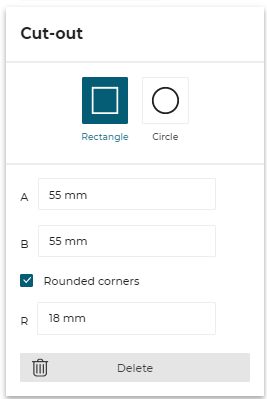
❗️ Note that some particular panels (especially glass panels) can be predefined with circular cut-out by default. In this case these cut-outs are not editable by the customer. See the Applicative Rules for DrillHolesWallPanelRule 🔗.
Change Grain Direction
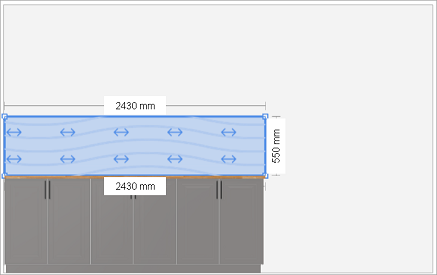
The user can change the grain direction of the whole wall panel with the "Next" and "Previous" directions. The available directions are aligned with the edges of the wall panel.
The default grain direction of a wall panel is horizontal
Delete Wall panel
To delete the wall panel, click the Delete Wallpanel button from the Wall panel options.
A wall panel once deleted can be added by undoing the action or by selecting Add option in the edit panel of the cabinet.
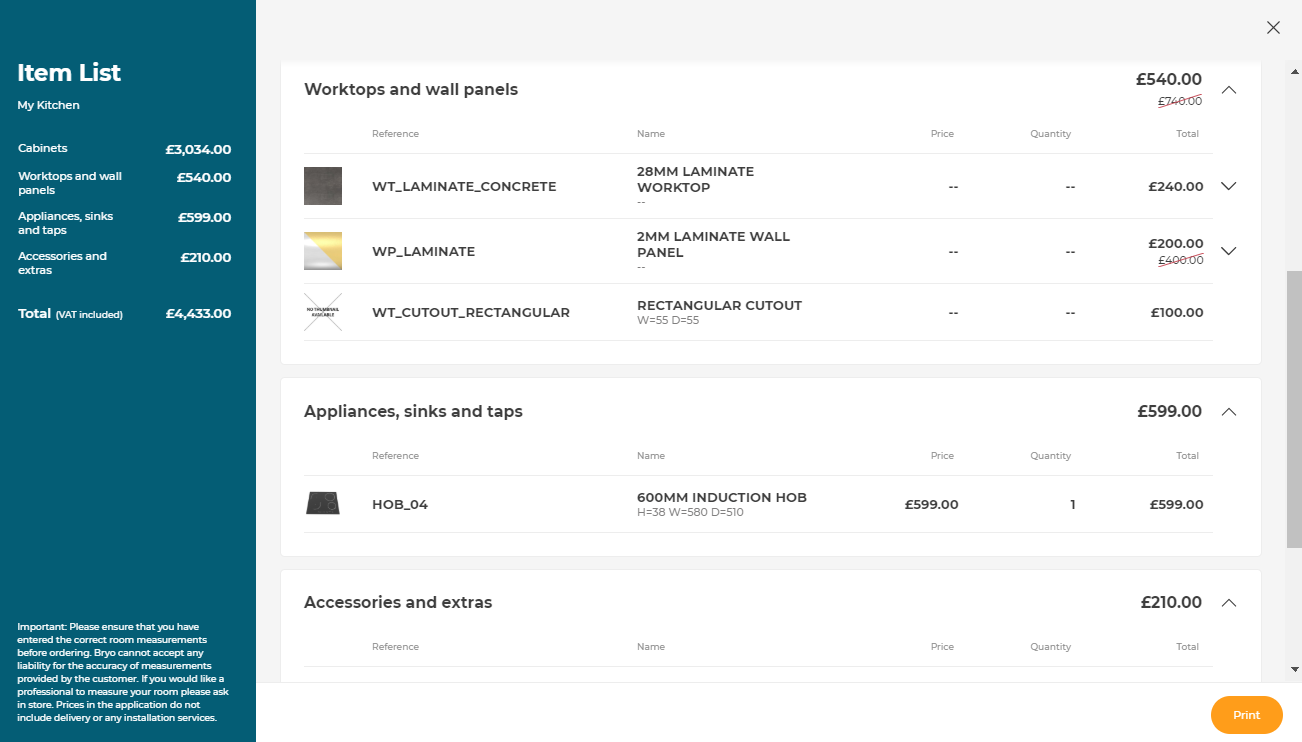
Possible Result in the Item List
Like all the illustrations in this page, this is a BRYO sample
Depending on the customer's choice, all products are priced separately and visible in the item list.
