Create Images
Generating realistic image of the kitchen is possible with this feature. This section explains the steps to create a realistic image of the kitchen.
Before proceeding to this, it is recommended to save project for correct functioning of all options available in this feature. However, many options in this feature would require saving the project before proceeding.
Create Image
Create a Screenshot
You can take a screenshot of your created project.
- Click the Create Image option and select the Create a screenshot button.
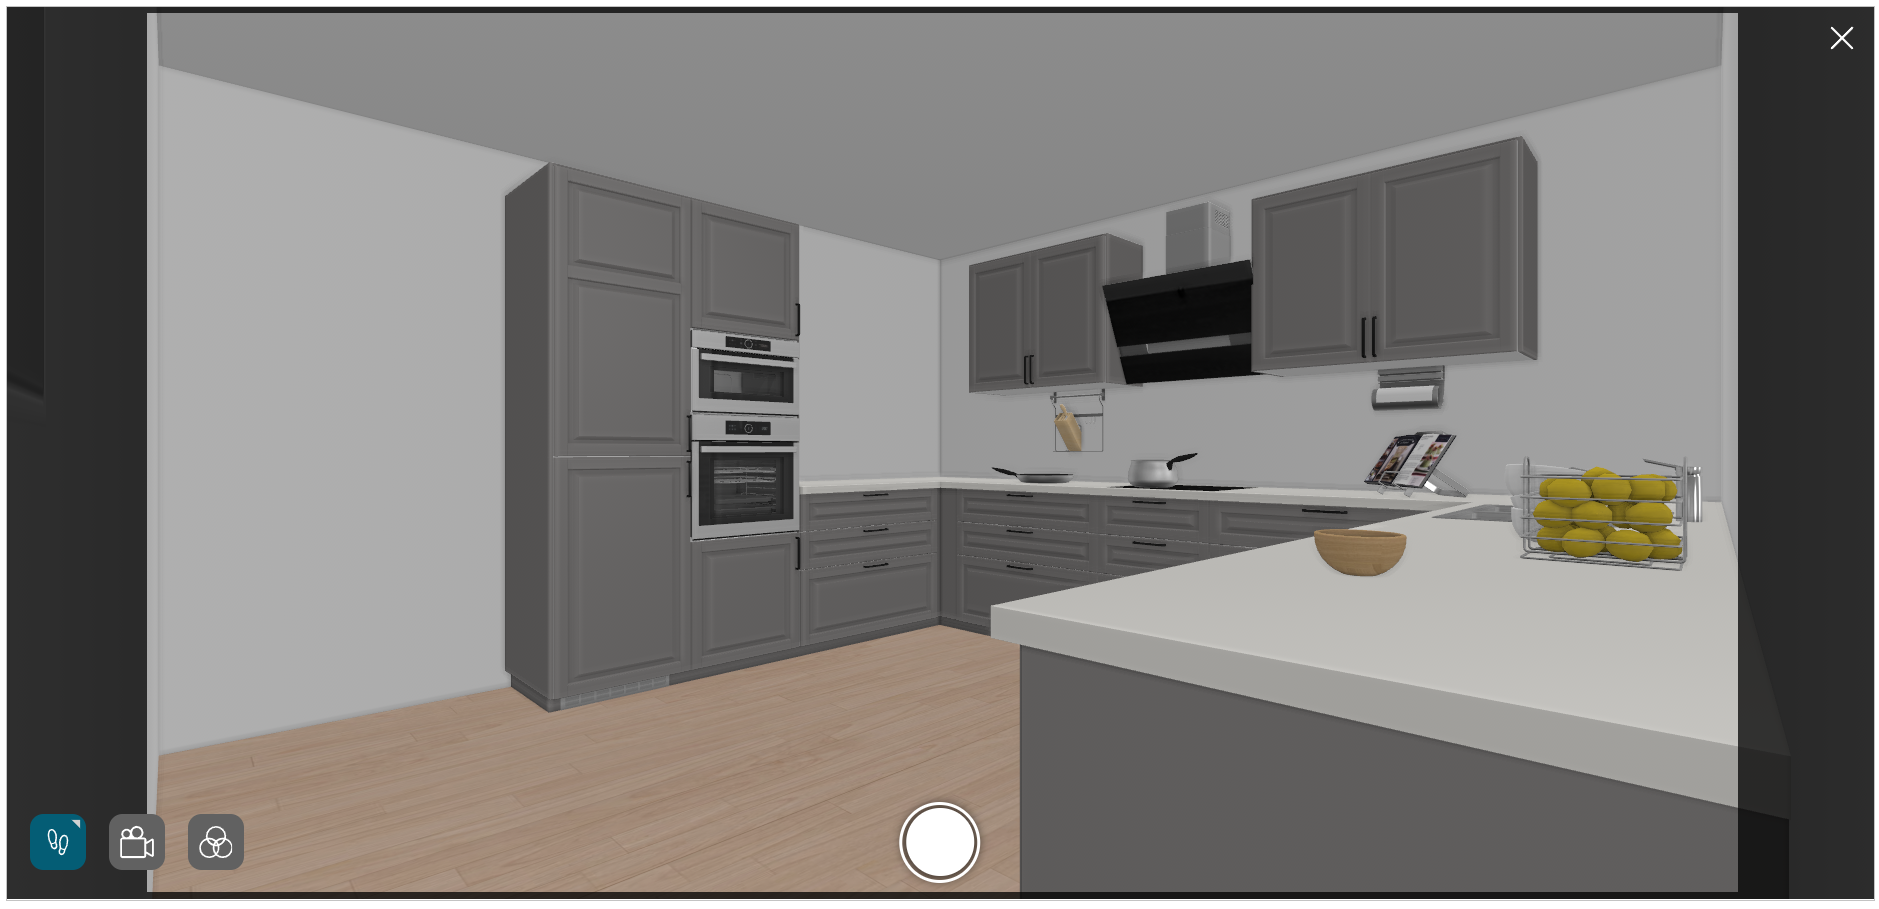
The window to adjust the screenshot image is displayed, as shown below:
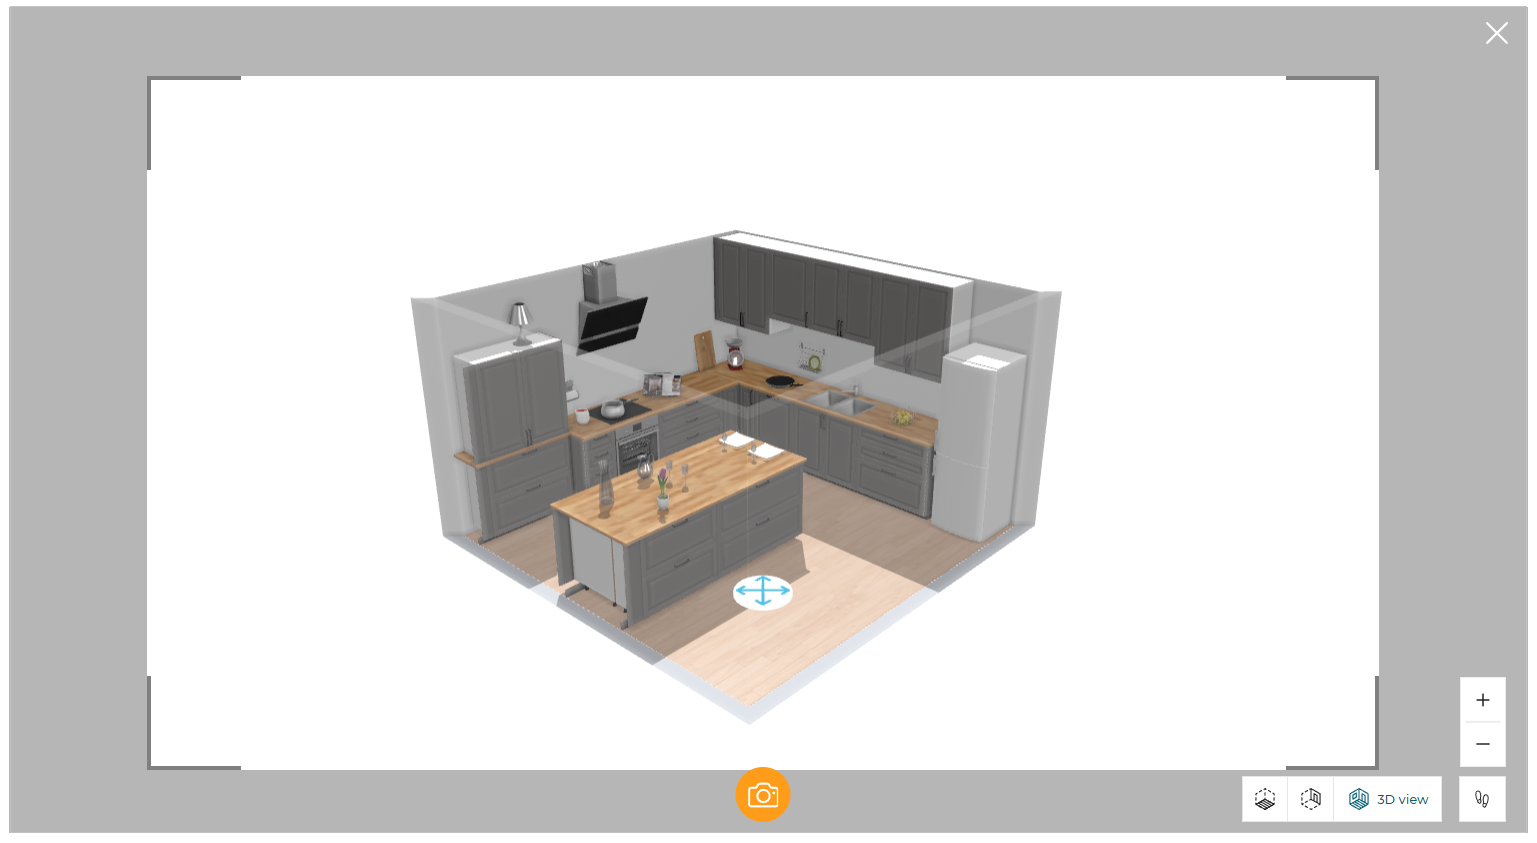
- Click the
 icon to take a screenshot.
A pop-up message Your new screenshot is available is displayed, as shown below:
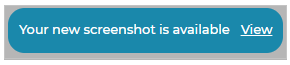
- Click the View button to view the generated screenshots.
The screenshot is displayed in a new window, as shown below:
Create a Realistic Image
To create a realistic image, click the Create Image option and select the Create a realistic image button.
Confirmation pop-up appears, as shown below:
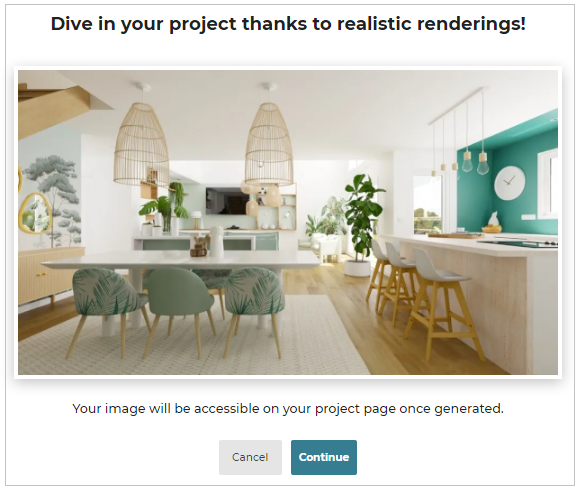
- Click the Continue button to generate a realistic image.
A pop-up window for image adjustment appears, as shown below:
For more information, please refer Basic Adjustments for an Image.
Get Started with Realistic Picture:
Adjust the picture with respect to: Camera angle. Viewer’s height. Viewer’s position. Moods. Background image. Sun position. Sun inclination.
| Command | Icon | Description |
|---|---|---|
| First person view |  | To switch to first person view. |
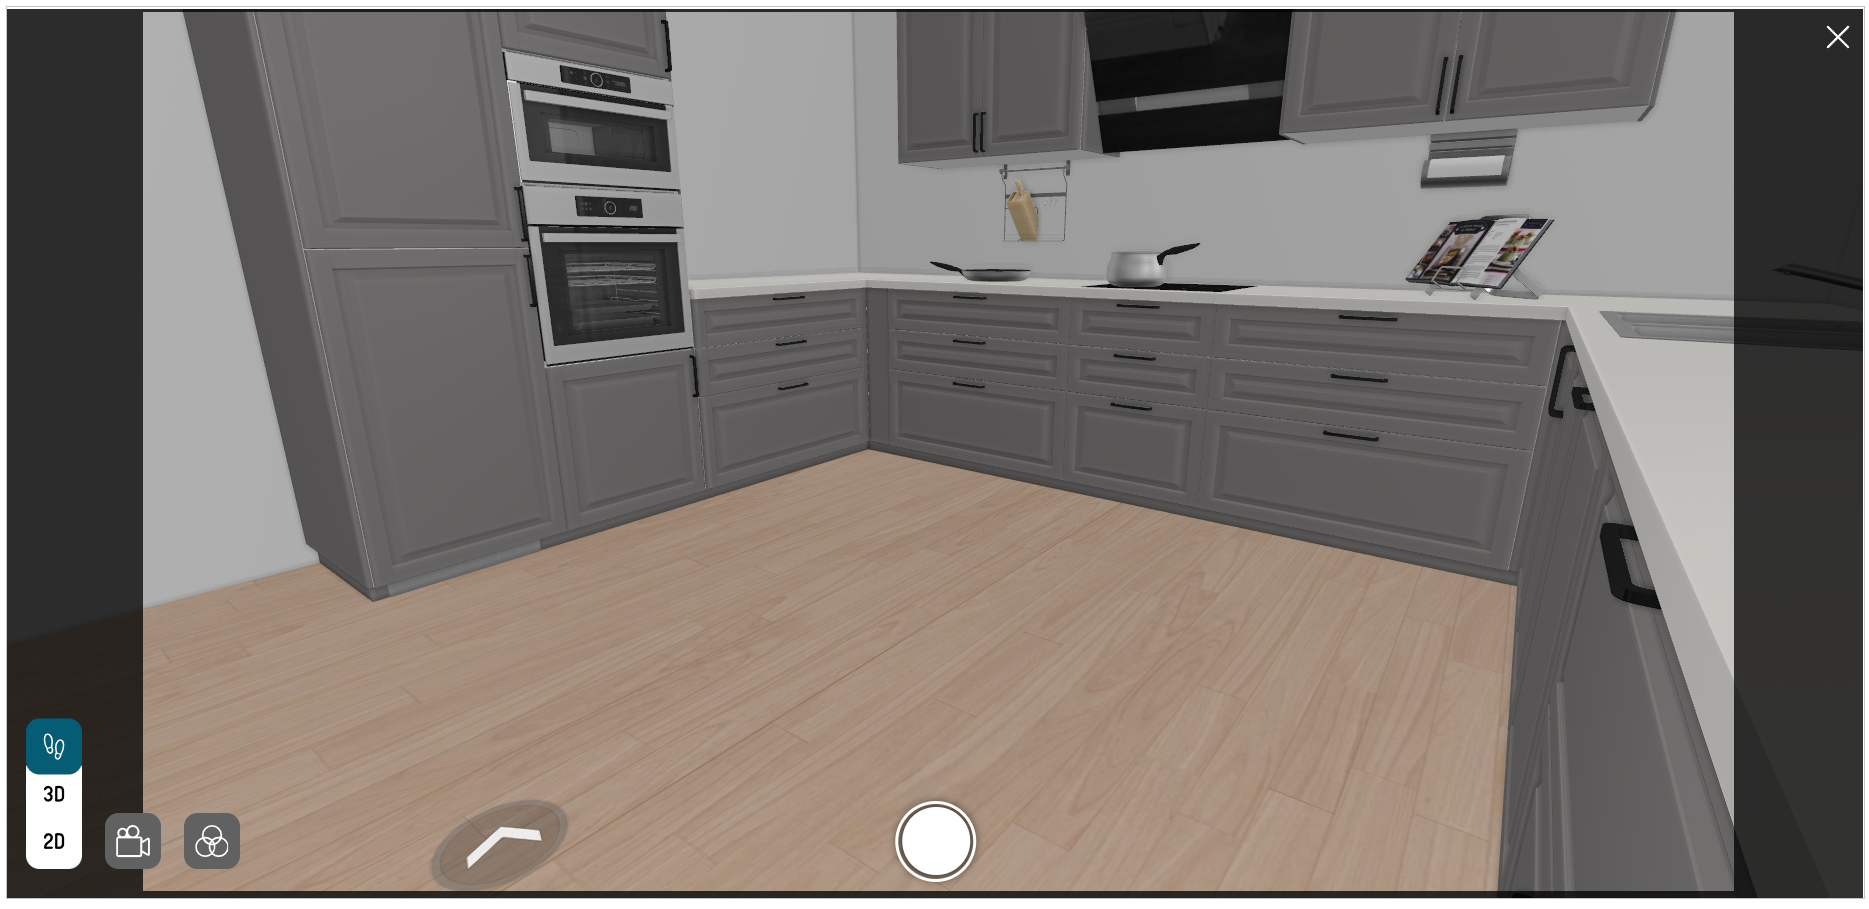
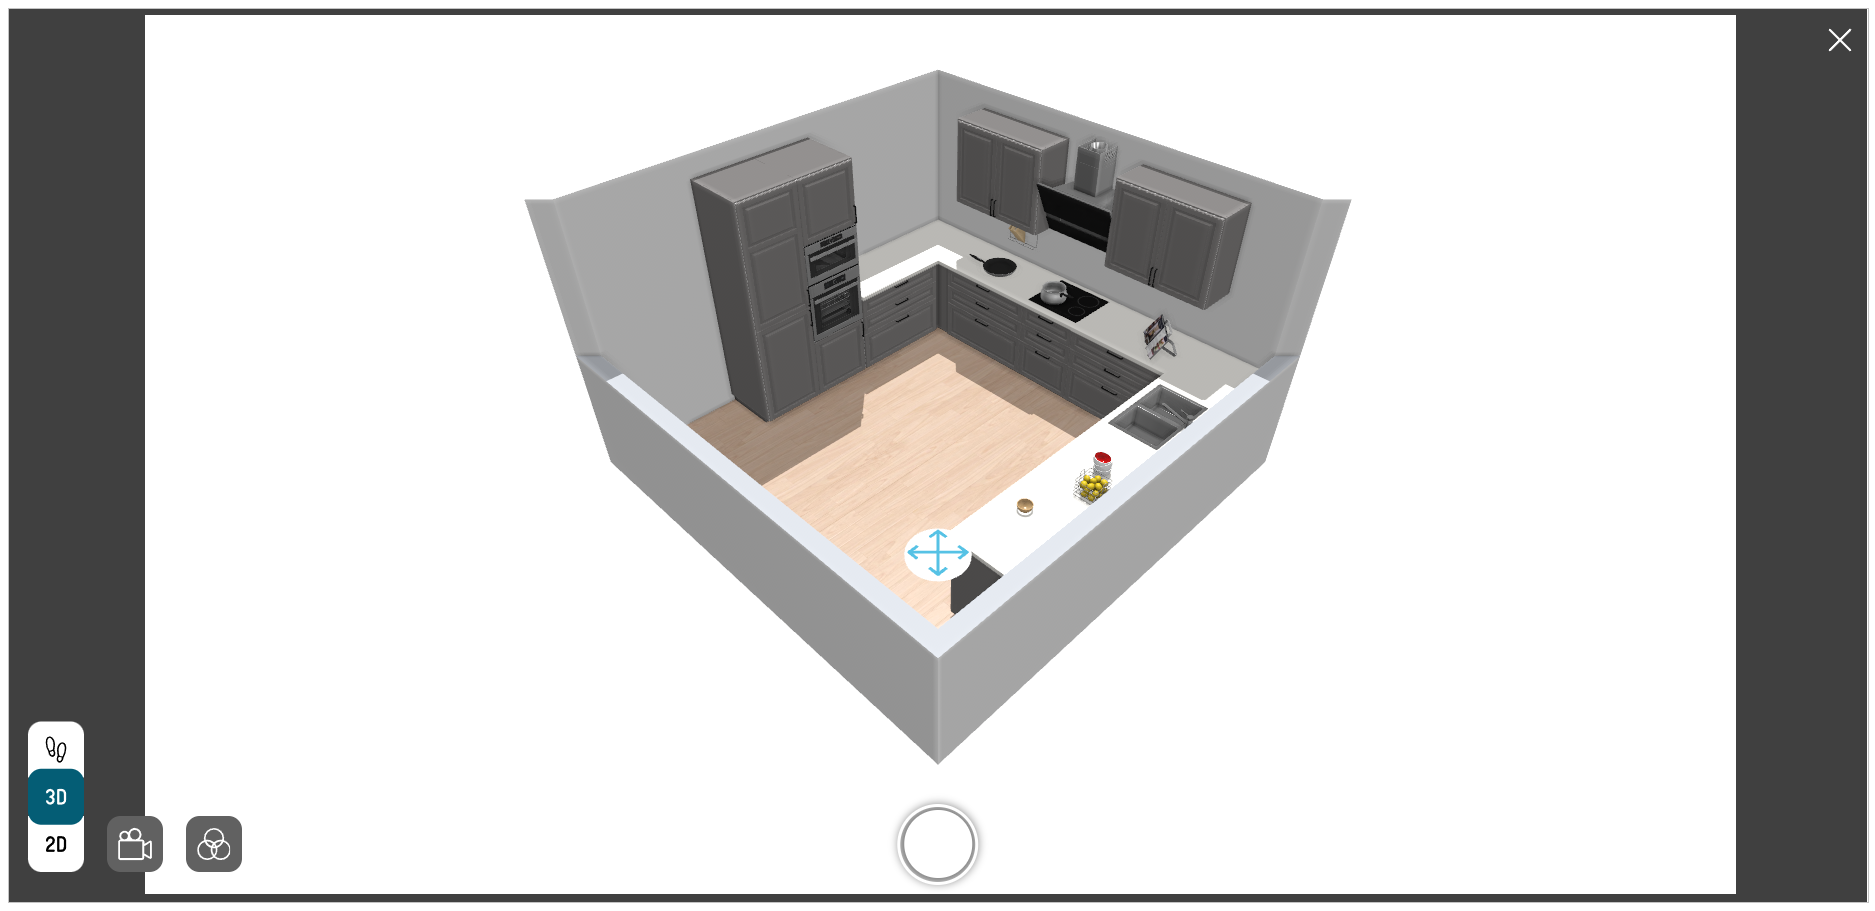
| 3D |  | To switch 3D view. |
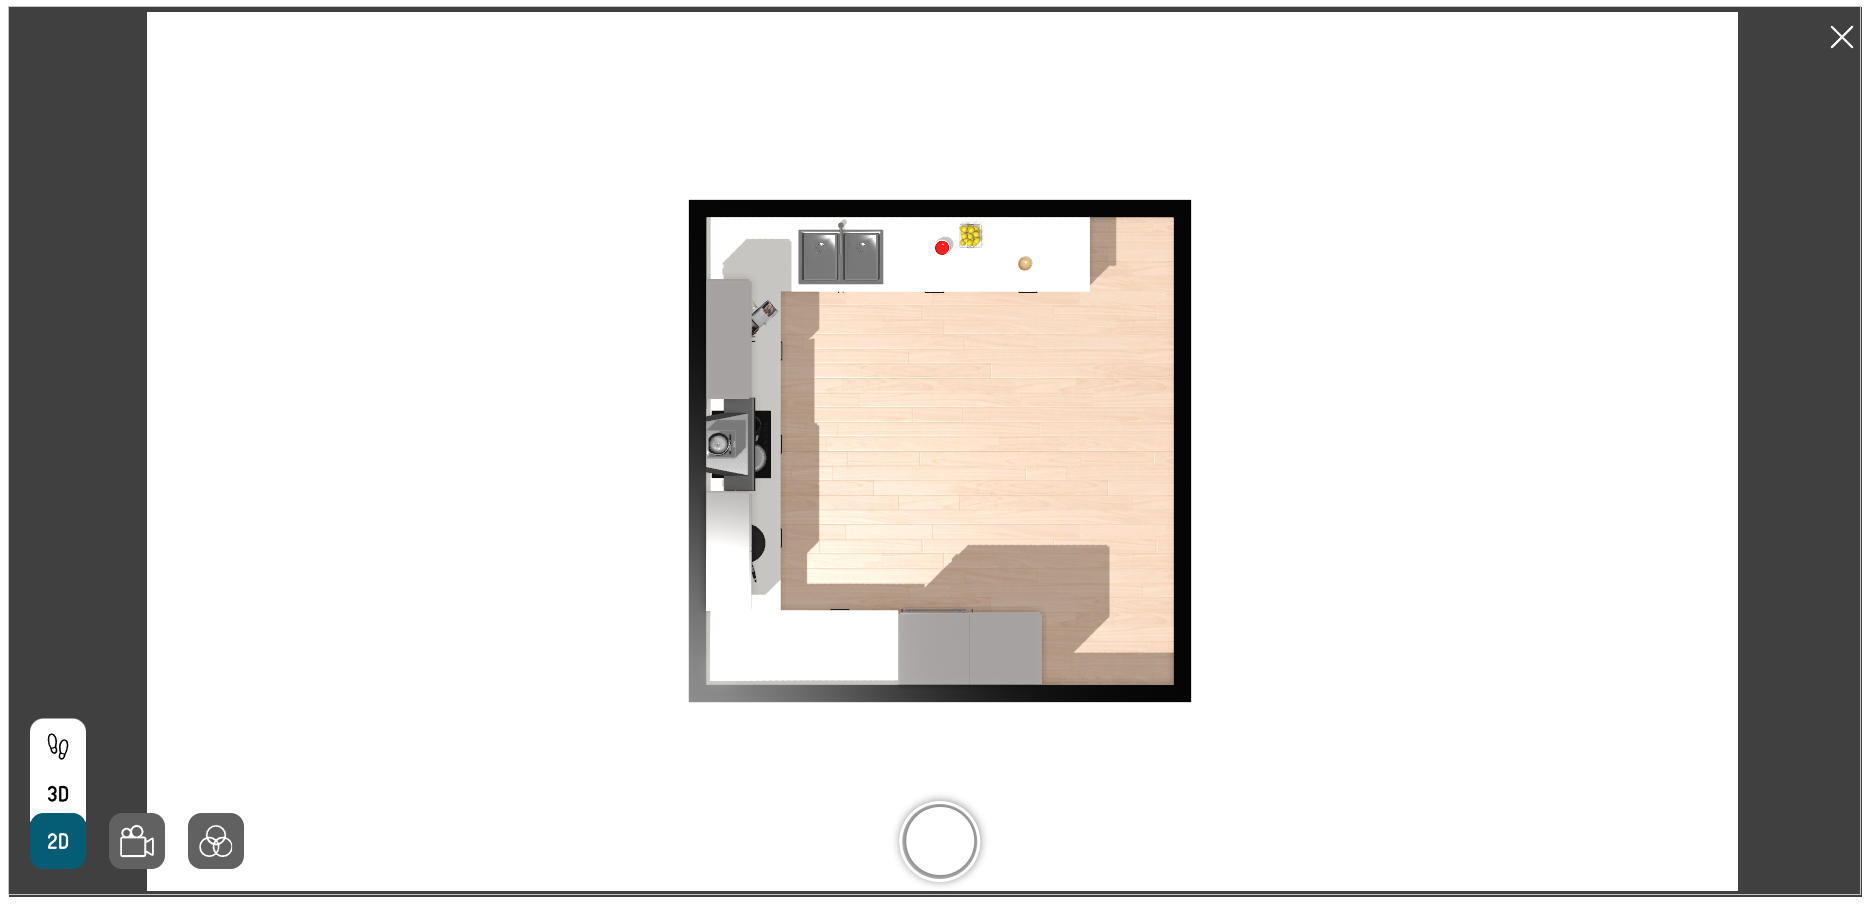
| 2D |  | To switch to 2D view. |
| Cameras |  | Allows adjusting the camera height and position. |
| Tilt |  | Allows adjusting the tilt angle of camera. |
| Focal |  | Allows adjusting the focal length of the camera. |
| Moods |  | Allows setting up different moods. |
| Sun Position |  | Allows adjusting the sun position in the picture |
| Sun Inclination |  | Allows adjusting the sun inclination for the picture |
| Viewer's Position |  | Allows adjusting the avatar's position in the picture |
Cut view and aerial view option
You can view the room from an aerial view:
- Click the icon. The view options are displayed, as shown below:
- Click the icon, to change the view to 3D view, as shown below:
- Click the icon, to change the view to 2D view, as shown below:
- Click the
 icon, to generate the image.
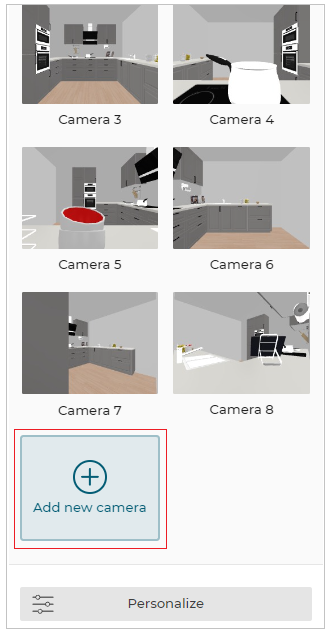
Cameras
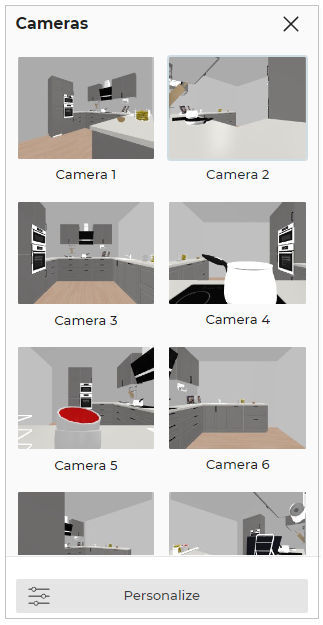
You can adjust the different camera angles for the room.
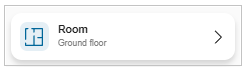
- Click the Room option, to switch between multiple rooms, as shown below:
The available rooms are displayed, as shown below:
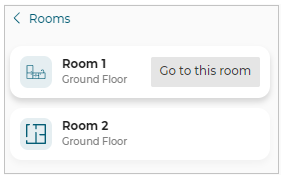
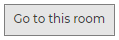
- Click the Go to this room option, to switch to the selected room, as shown below:
- Click the icon, the list of different camera angle options according to the room is displayed, as shown below:
- Click the
 icon, to customize the camera angle required accordingly.
The personalized camera options are displayed, as shown below:
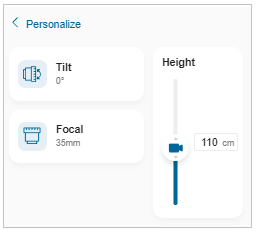
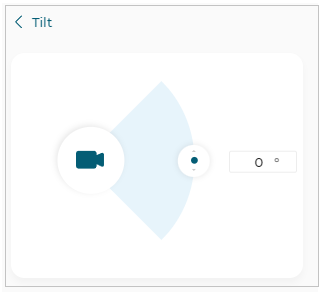
Tilt angle
You can set the tilt angle by:
a. Rotate the tilt angle or
b. Enter the tilt angle.
- Select the icon, the option to tilt the camera angle is displayed, as shown below:
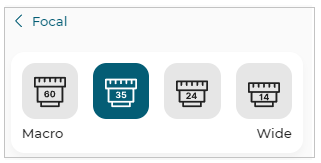
Focal
You can adjust the camera focal lens value from the available macro to a wide range.
- Select the icon, the focal lens options are displayed, as shown below:
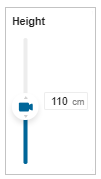
Height
You can adjust the camera height by:
a. Select and drag the camera height or
b. Enter the height value.
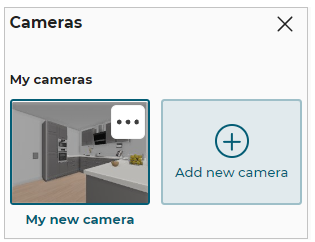
Add New Camera
You can add a new camera option to the list.
- Click the Add new camera option, as shown below:
To add a New camera option is displayed, as shown below:
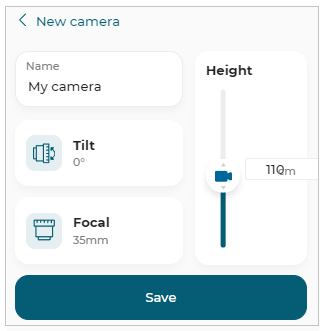
You can modify and add a new camera.
- Click the Save button, once the New camera option is modified.
To rename or delete the new camera option:
- Click the
 icon, the rename and delete new camera option is displayed, as shown below:
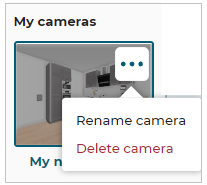
a. Click the Rename camera button. The Rename camera option is displayed, as shown below:
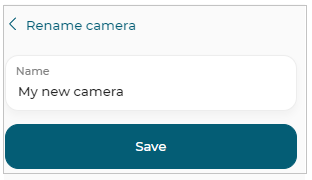
Once the camera name is modified, click the Save button to update the name.
b. Click the Delete camera button, to delete the added camera.
Moods
You can set different moods for your room.
- Click the icon, the different mood options are displayed, as shown below:
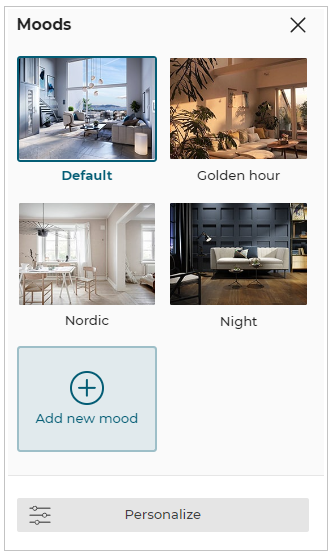
- Select the mood from the available list to set the mood of the room accordingly.
The mood of the room is set, as shown below:
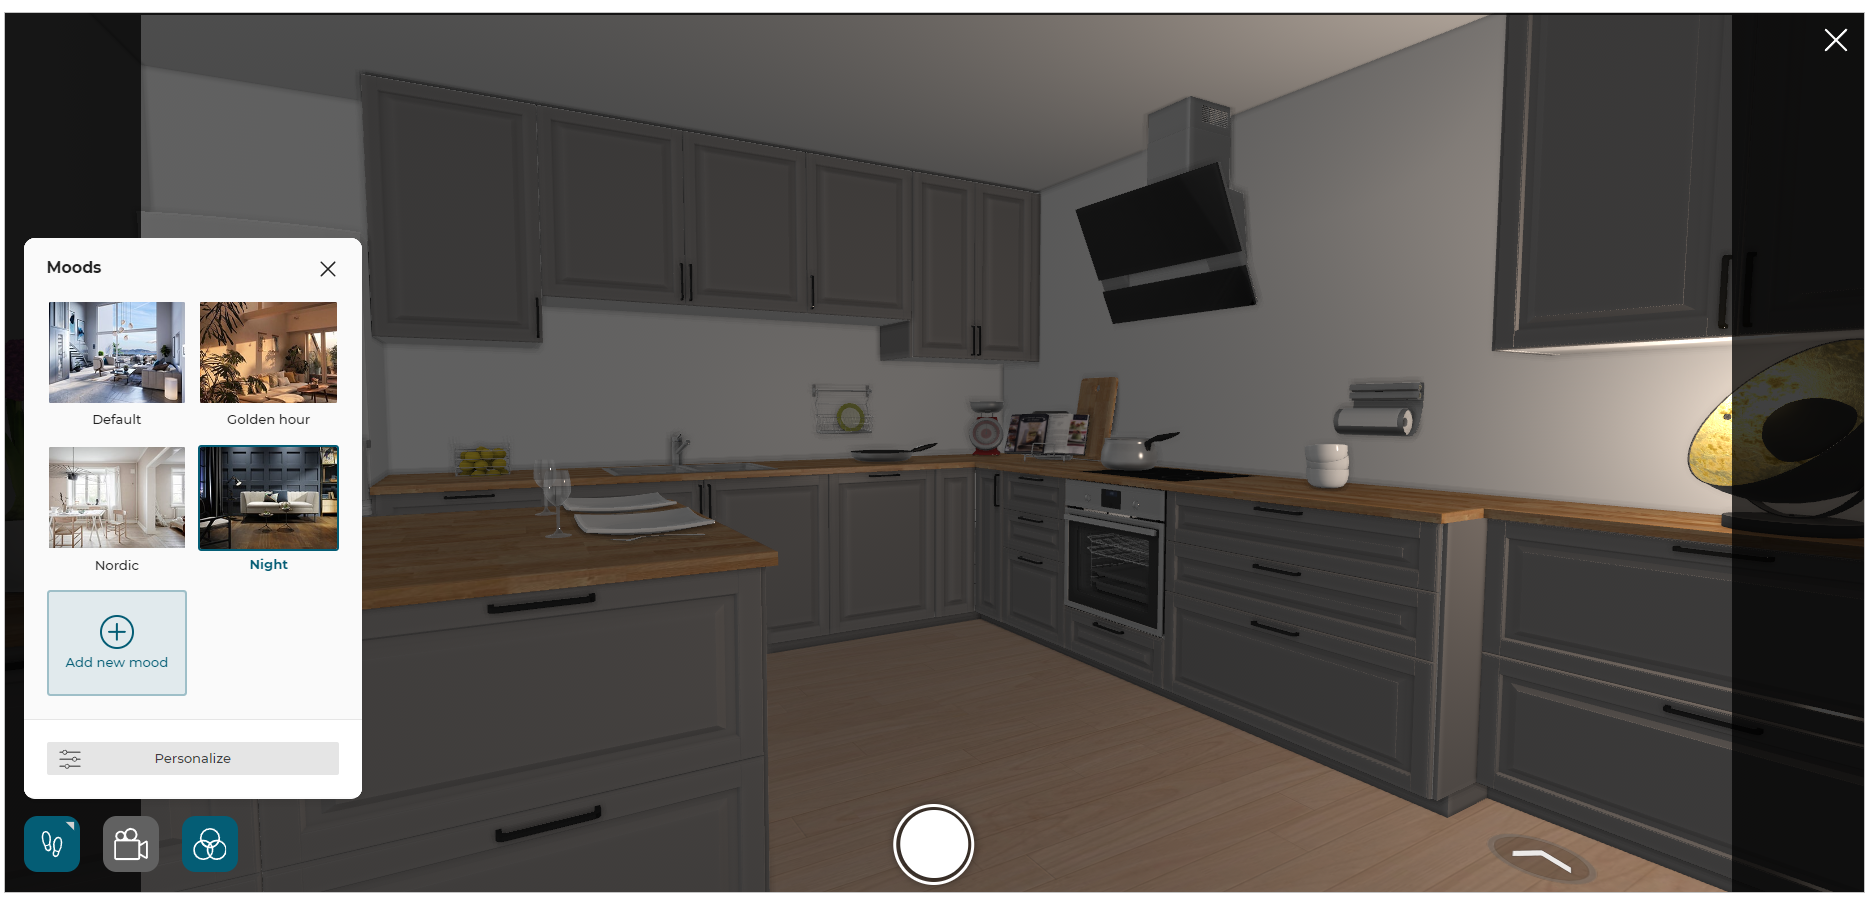
- Click the icon, personalized mood option are displayed, as shown below:
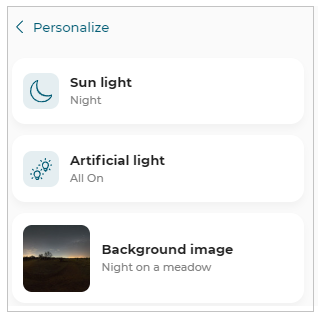
Sunlight
- Click the
 icon, the sunlight options are displayed, as shown below:
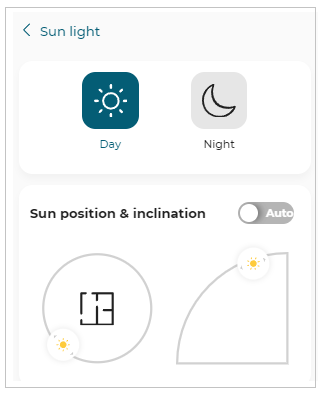
You can switch between Day or Night.
Sun Position & Inclination
a. Sun Position
The position of the sun can be manually adjusted to the circular path of the sun with this setting.
You can change the sun's position, as shown below:
b. Sun Inclination
The position of the sun can be manually adjusted to the circular path of the sun with this setting.
You can change the sun's inclination, as shown below:
To set the Sun Position and Inclination automatically with the best light to create the most beautiful image toggle ON the Auto option.
Artificial light
You can adjust the light temperature and brightness of artificial lights.
- Click the
 icon, the artificial light options are displayed, as shown below:
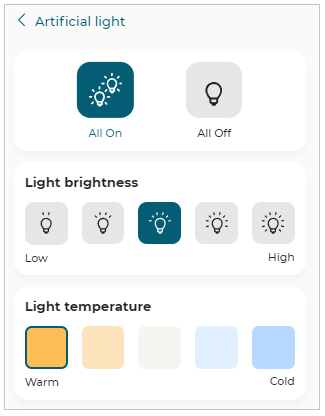
- Select the setting to apply it to the artificial lights in the room.
Background Image
- Click the Background image option. The list of available background images are displayed, as shown below:
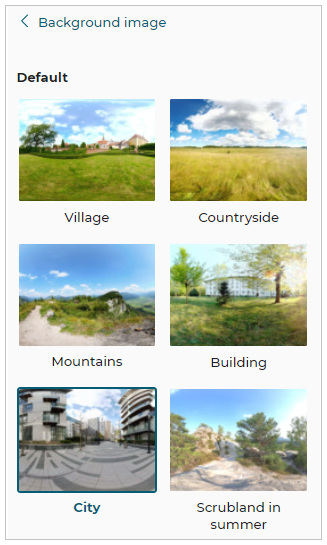
- Select an image from the available list to apply the background image to your room.
The Background images can be changed by using this feature only in first-person view.
- After all the adjustments are done, click the icon to generate the image.
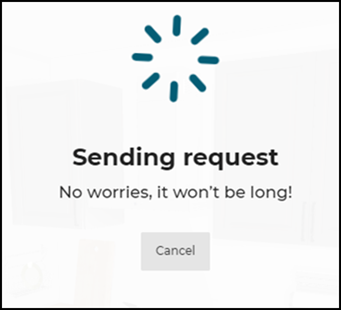
The Sending request pop-up is displayed, as shown below:
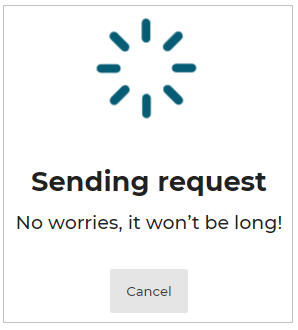
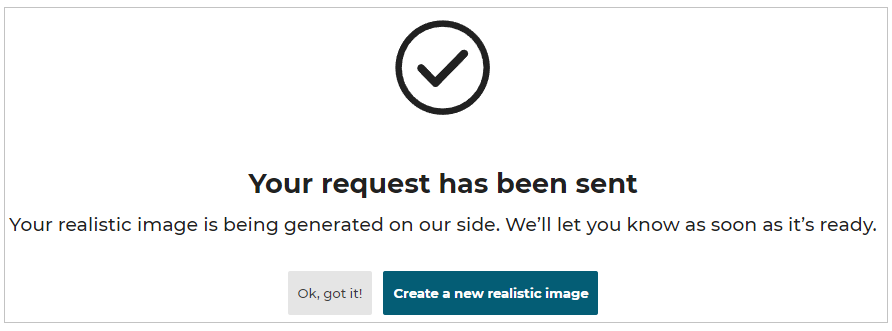
- Click the Ok, got it! button, to close the window.
For a new realistic picture, click the Create a new realistic image button.
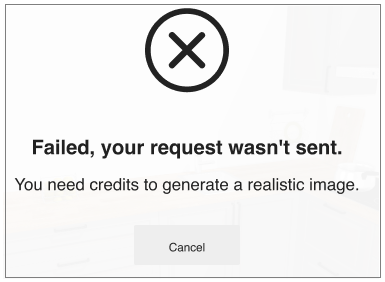
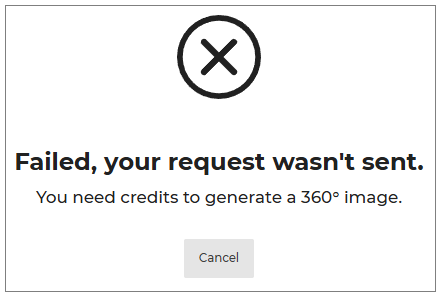
If you do not have enough credits to perform a HQ render, a specific message appears informing you that there are no credits available for this operation, as shown below:
To view the generated realistic pictures, please refer to View images.
Realistic/3D image of kitchen generated is available on clicking Show images of Images & 2D Plans in Summary step.
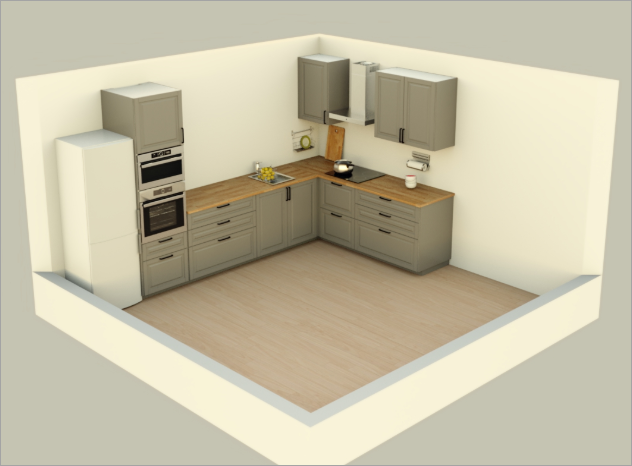
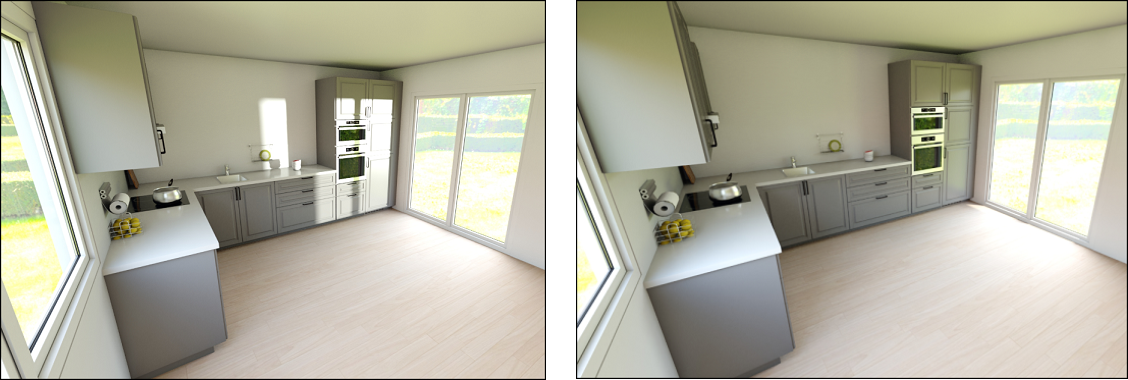
Example of a realistic image is shown below:

Example of a 3D image is shown below:
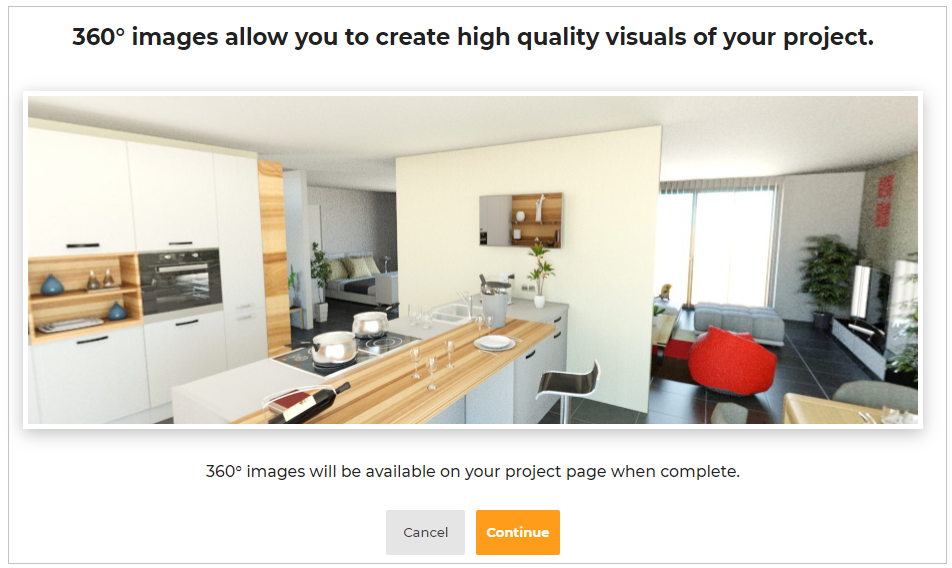
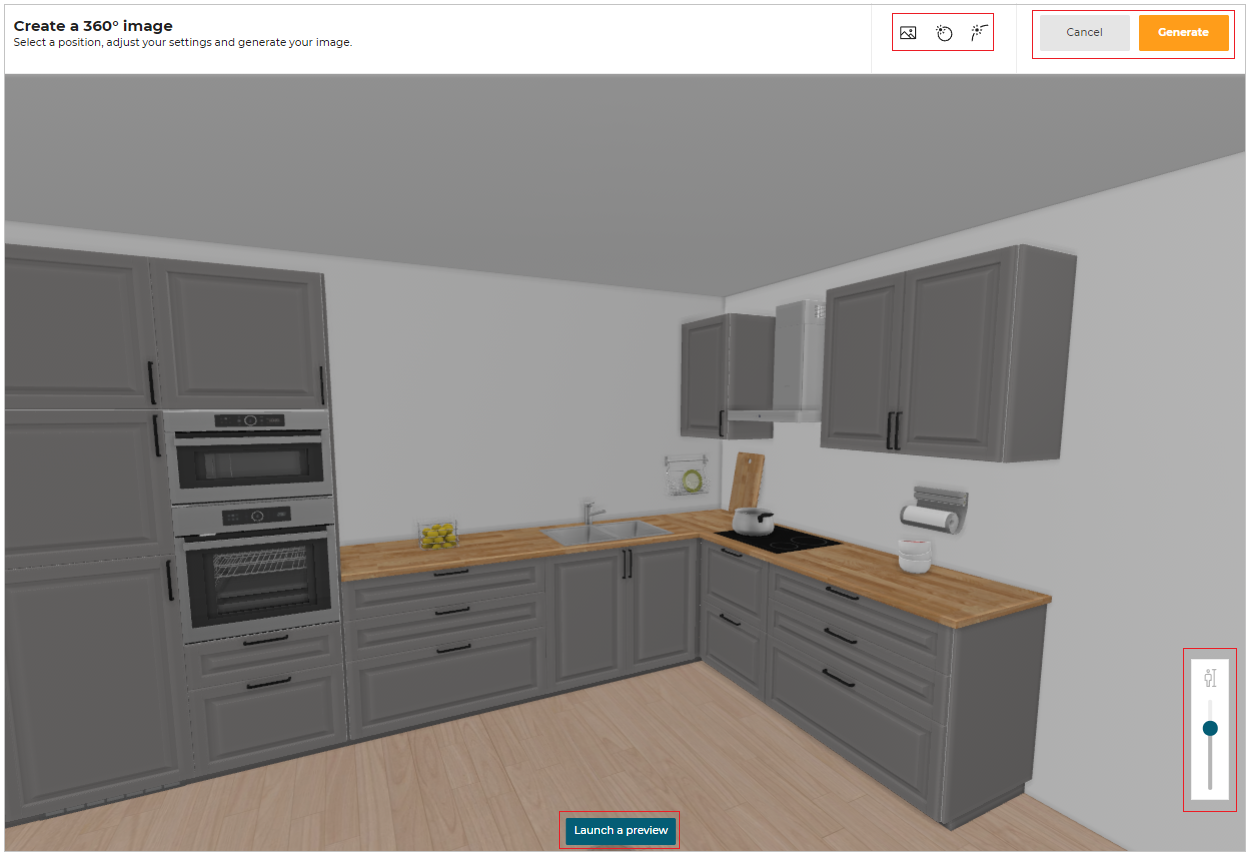
Creating a 360° image
To create a 360° image, click the Create Image and select the Create a 360° image button.
Confirmation pop-up appears, as shown below.
Click the Continue button to generate 360° image, as shown below.
A pop-up regarding adjustment for the image appears, as shown below:
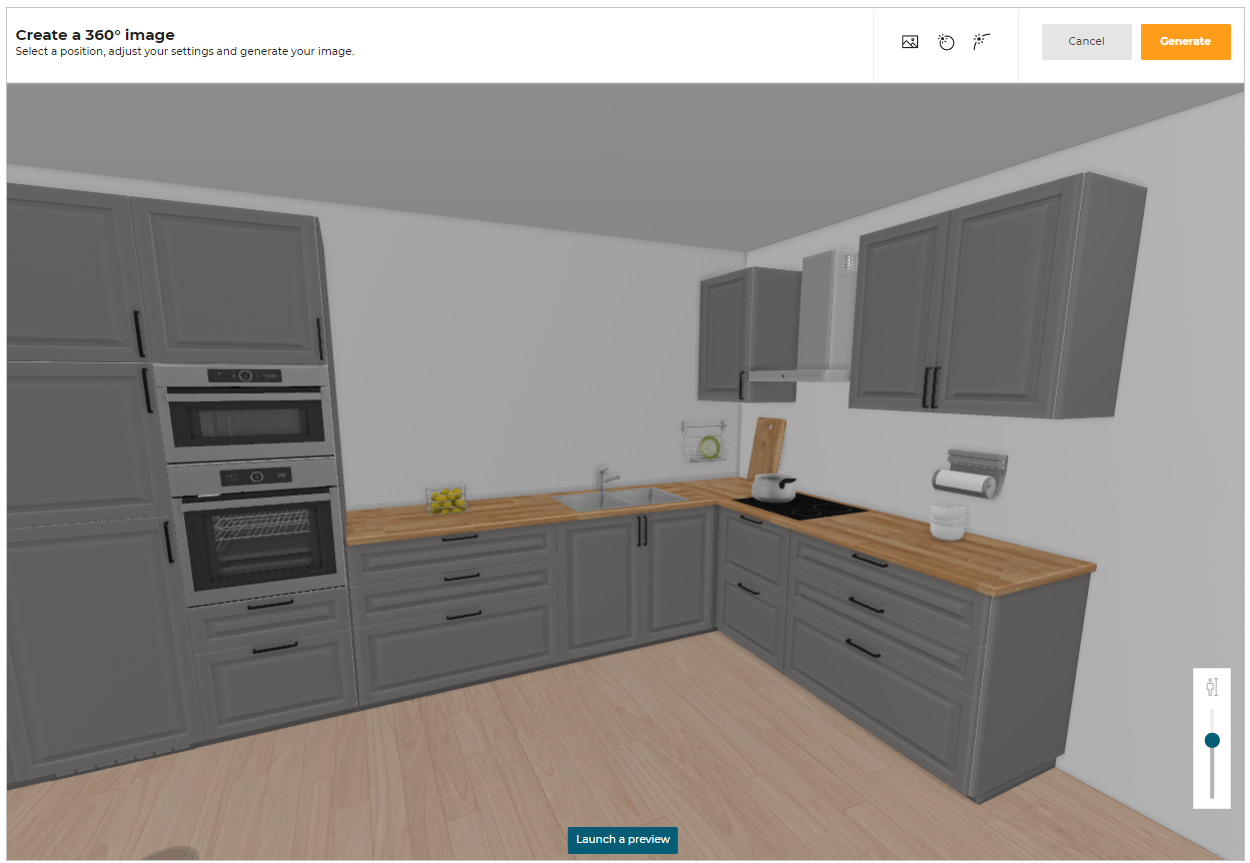
For more information, please refer Basic Adjustments for an Image.
Click Generate after all the adjustments are done.
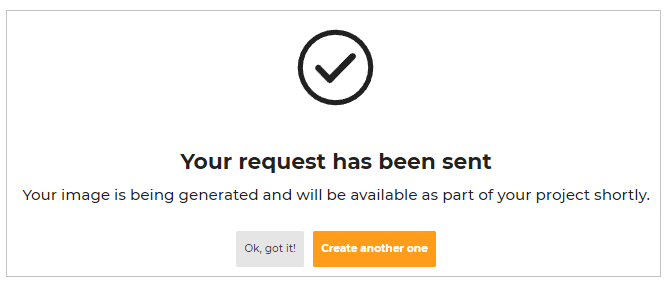
Information regarding the location of the 360° image and individual credits will be mentioned in the pop-up, as shown below.
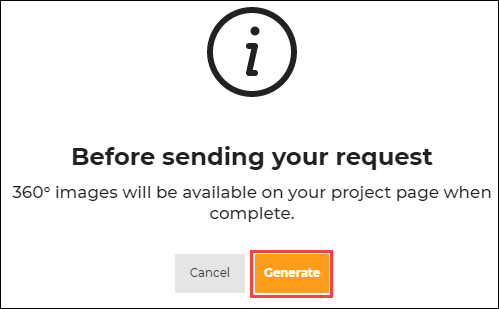
Click Generate to generate 360° image, request will be generated as shown below.
If you do not have enough credits to perform a 360° render, a specific message appears informing you that there are no credits available for this operation, as shown below:
360° image of kitchen generated is available on clicking project details or print.
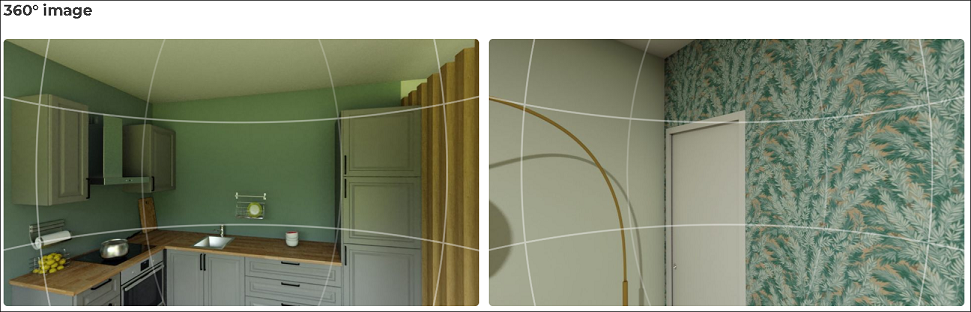
Example of a 360° image is shown below.
You can manually adjust 360° image with the help of adjustment panel, as shown below.
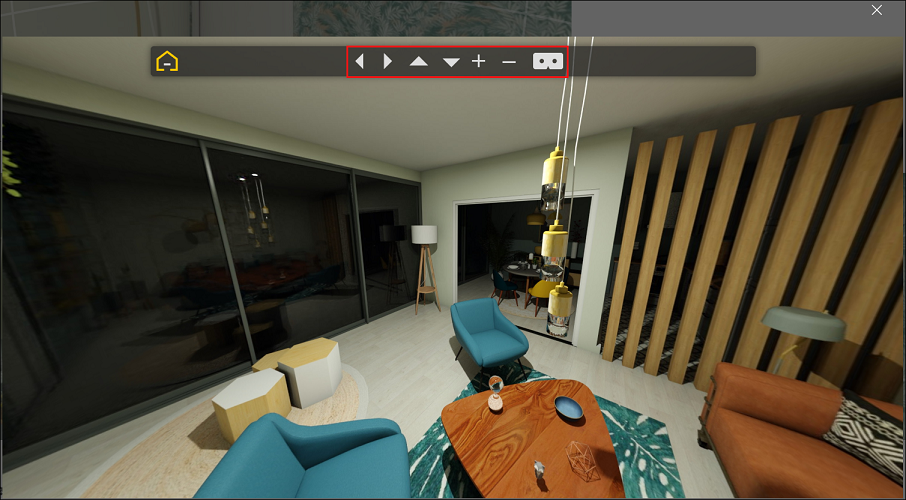
| Command | Description |
|---|---|
 | Image rotates left/right. |
 | Image rotates upwards/downwards. |
 | Image zooms in/out. |
 | Virtual Reality(VR) view displays. |
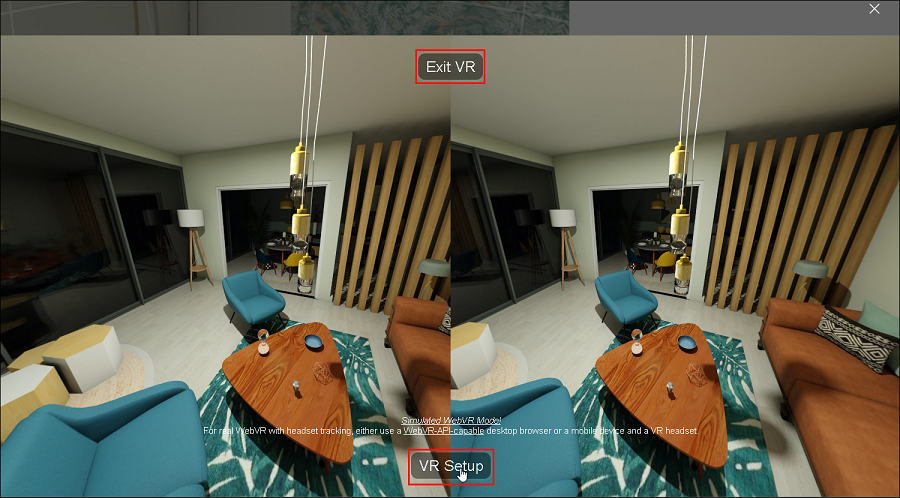
Click Exit VR to close the VR view.
Click VR Setup to adjust VR settings.
VR settings options display, as shown below.
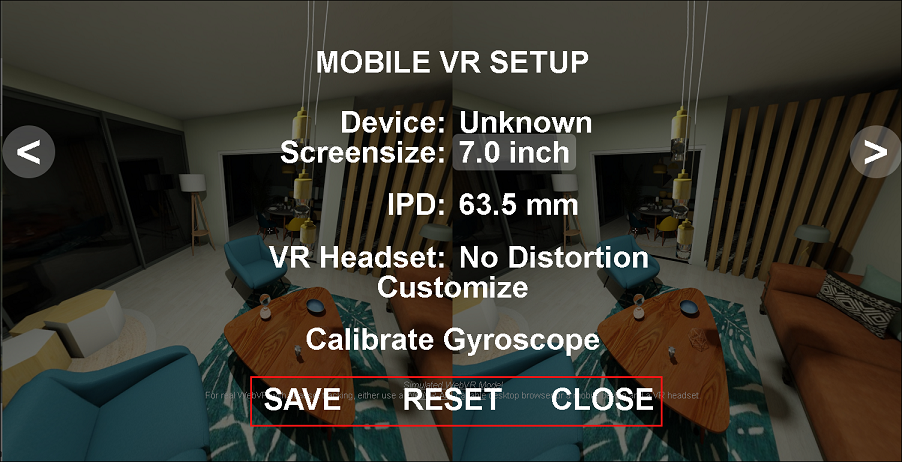
Adjust the VR settings and click Save, adjustements will be applied.
To reset the VR settings, click Reset.
To close the VR settings, click Close.
Basic Adjustments for an Image
After selecting the type of the image to be generated, a pop-up regarding adjustment for the image appears, as shown below:
It is recommended to select the view mode before beginning the adjustments.
- Background Image:
This feature is only available for first person image and not for 3D image.
Background image for the window/door can be adjusted with the help of this setting.
The view from the kitchen of different backgrounds can be seen.
Click , option to change background image is available, as shown below.
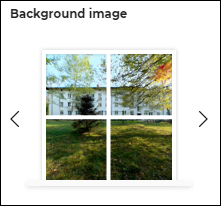
Multiple backgrounds are available to user.
Some of the examples are shown below.
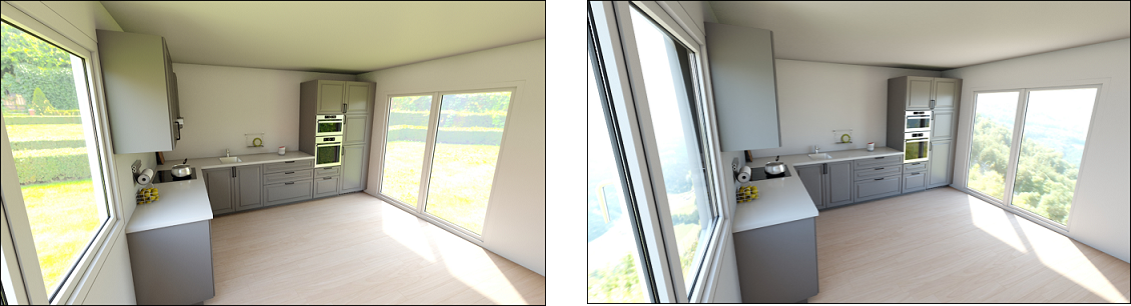
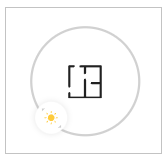
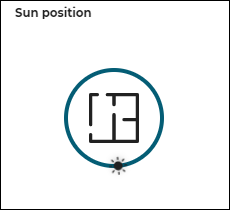
- Sun Position:
The location of the sun can be manually adjusted in the circular path of sun provided with the help of this setting.
Different view of kitchen due to sun position can be seen with the help of this setting.
Click , option to change sun position is available, as shown below.
Difference in realistic image after changing Sun Position is shown below.

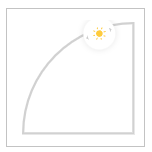
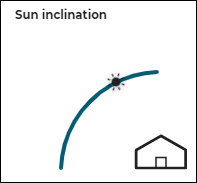
- Sun Inclination:
Sun Inclination can be manually adjusted in the inclination path provided with the help of this setting.
Different view of kitchen at different sun inclination can be seen with the help of this setting.
Click , option to change sun inclination is available, as shown below.
Difference in realistic image after changing Sun Inclination, as shown below:
Human Height:
Height of the human for different views can be adjusted in the Height box provided for first person view mode.Different view of the kitchen at different heights can be seen with the help of this setting.
Adjust the height for the view from the option available, as shown below:
Launch a preview:
This feature is only available for a 360° image.
A 360° preview of the kitchen can be seen with the help of this feature. Manually adjust the location for the view, and click Launch a preview to begin.
Click the Stop preview to stop.
Click the Generate button after all the adjustments are done.
View Images
This section allows you to view Images and 2D Plans of the kitchen project.
For more information, please refer 2dPlans 🔗,
hqRendering 🔗 and 360Rendering 🔗.
⚙️ Set up: Application distribution parameter images2DPlans 🔗 and Images2DPlansRequested 🔗.
If the value ofimages2DPlansis not defined in thewidgets, then theImages2DPlansRequestedis displayed in the View Images option.
If the value ofimages2DPlansis defined, then the default widgetMediasis displayed.
To view the Images and 2D Plans, click the View Images option, shown below:
For more information, please refer to Media Widget 🔗
⚙️ Set up: kitchen iframe message Compute2DPlans🔗.
- If the value of the parameter
showFullIslandDimensioninCompute2DPlansis set to true, then all the possible dimensions of the island position are displayed.- If the value is set to false, then only one dimension of island cabinets position is displayed for each axis(the shortest one).
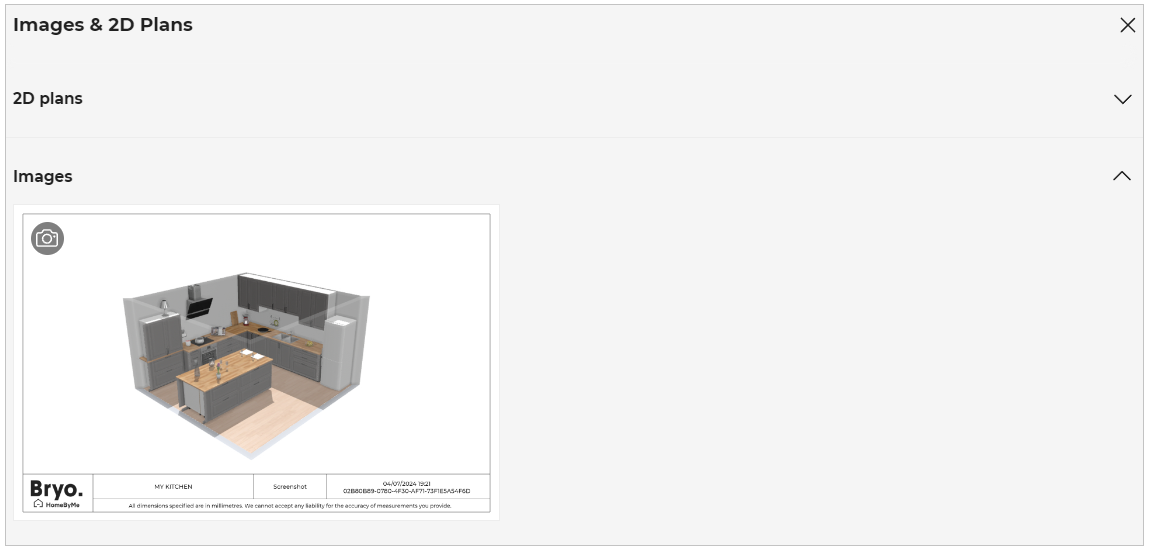
The Images and 2D Plans appear, as shown below:

The Download and Delete option is displayed when you hover the mouse cursor over HQ images, as shown below:
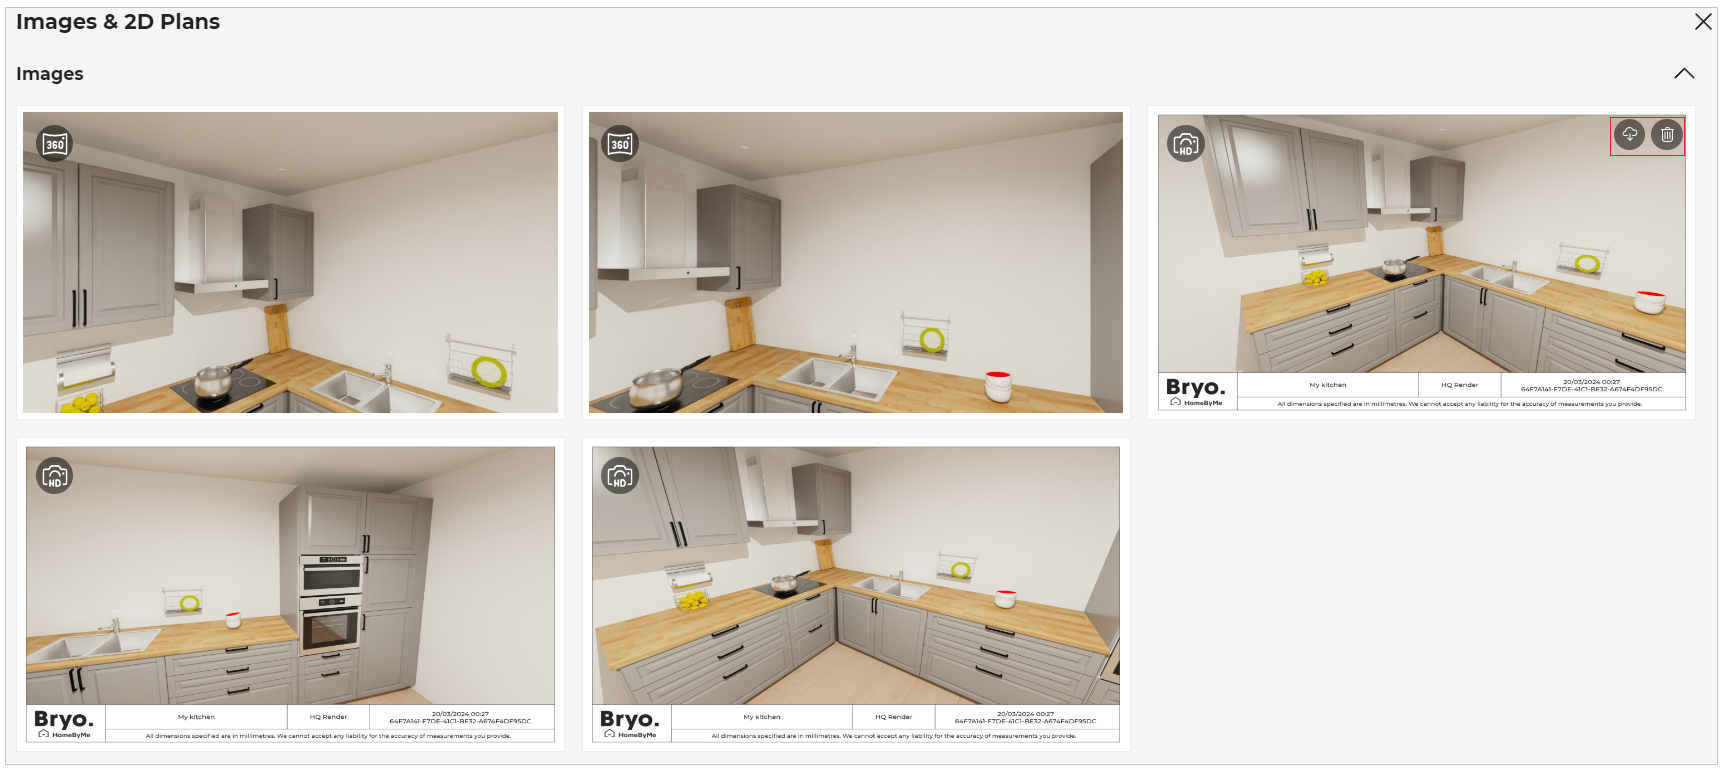
A Delete option appears when the mouse cursor hovers over 360° images , as shown below:
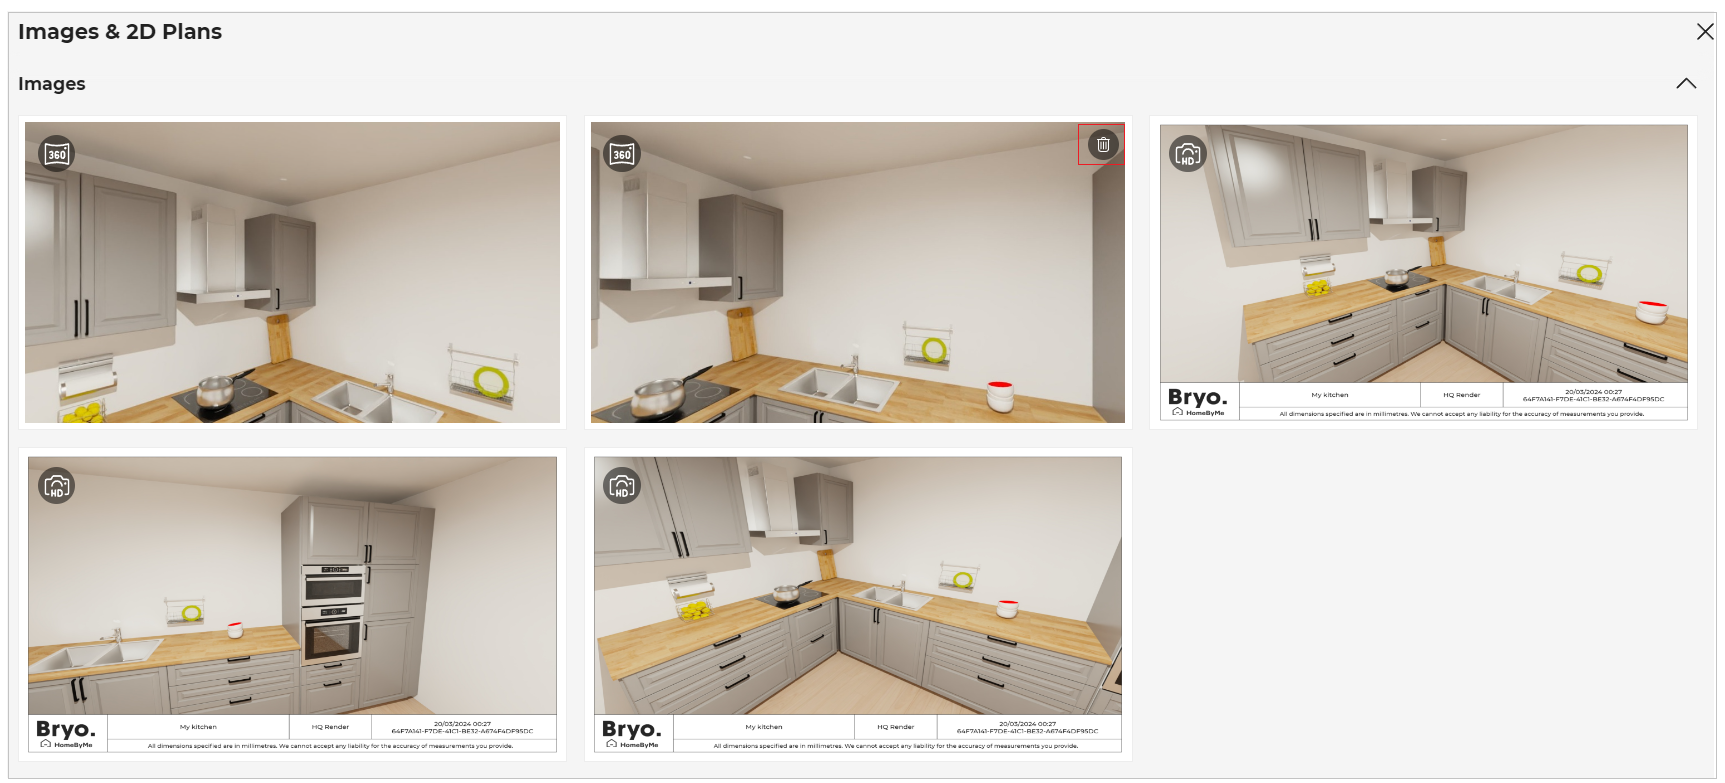
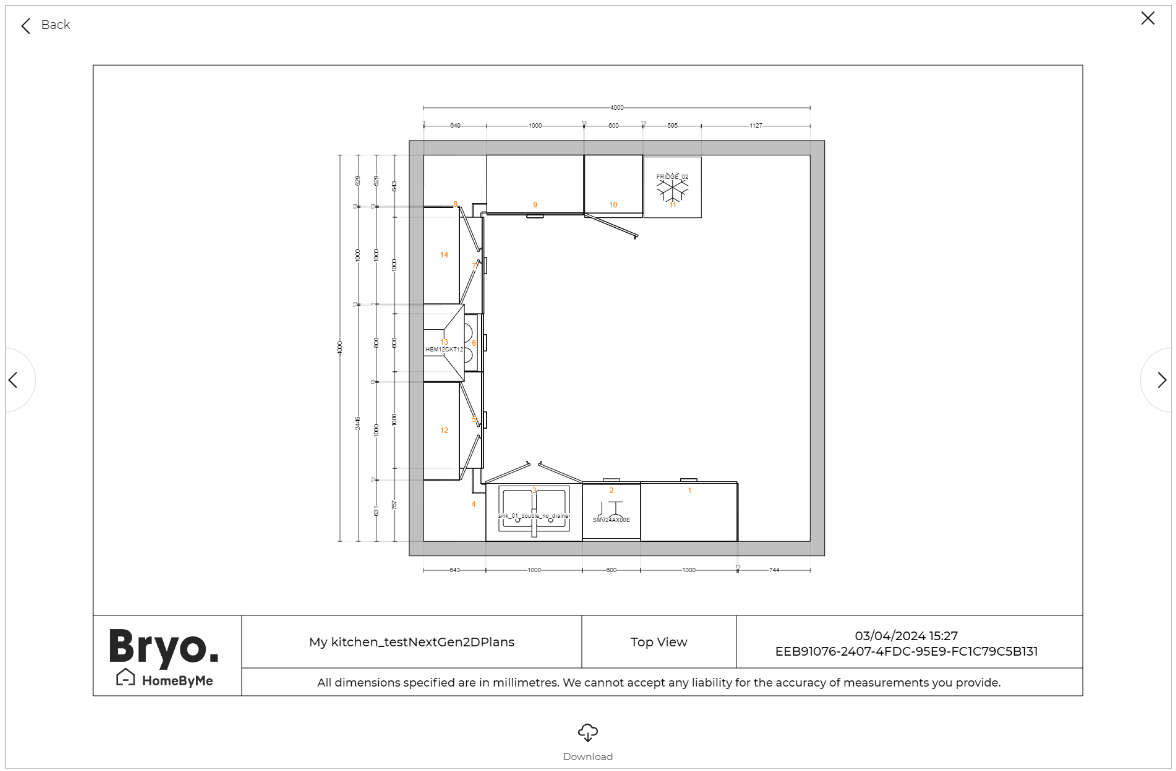
- Click the image/2D plan to preview it, as shown below:
You can preview the available 2D plans/ images of the project by clicking the previous/next arrow button.
- Click the Download button to download the 2D plans/ images.
⚙️ Set up: Application distribution parameter downloadImages 🔗.
- If the value of
download2DPlansis set to true in thewidgets, then theDownloadbutton for 2D plans is displayed.- If the value of
downloadImagesis set to true in thewidgets, then theDownloadbutton for Images is displayed.
- Select the 360° image and HQ image to preview the image, as shown below:
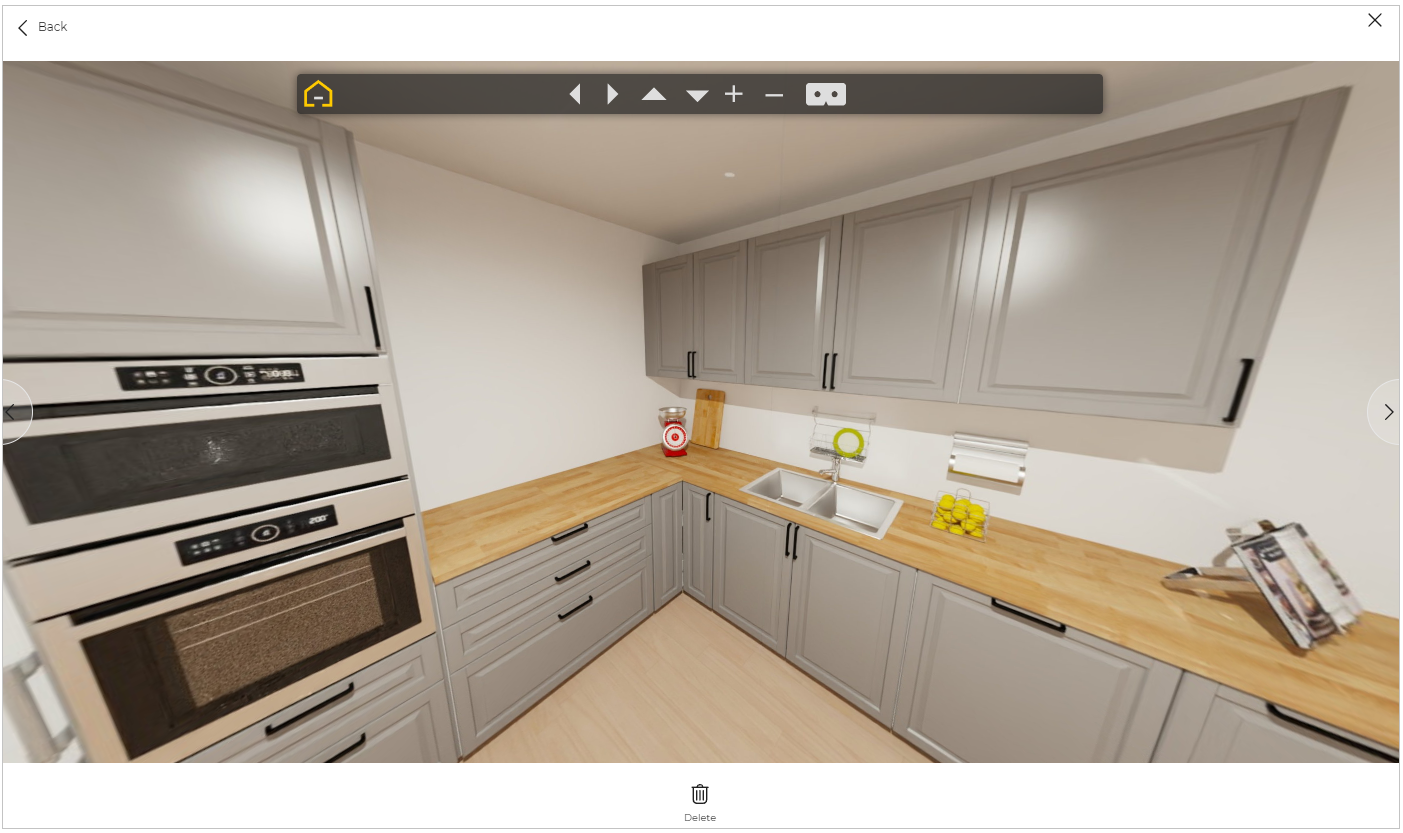
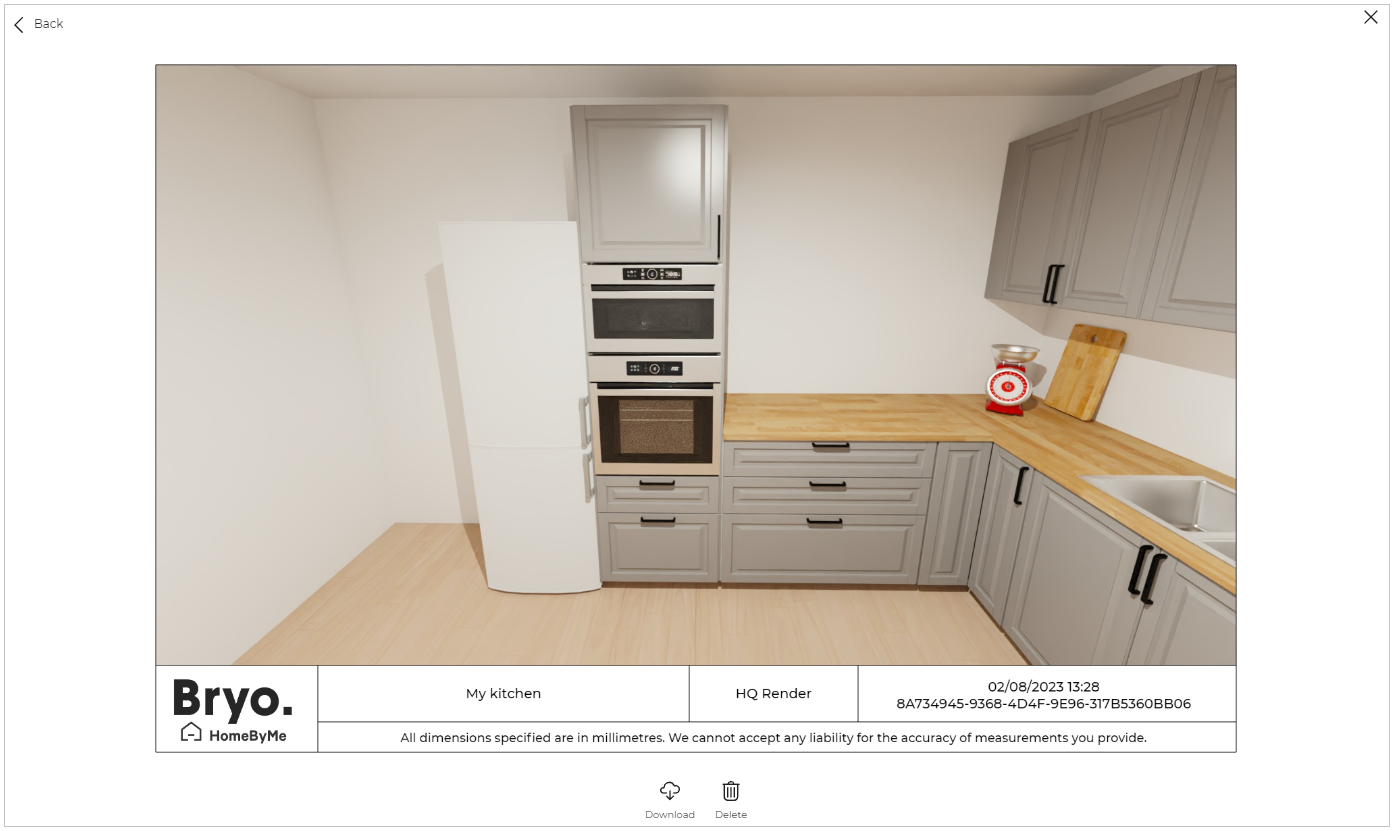
Click the Download button to download the image.
Click the Delete button. The confirmation pop-up is displayed, as shown below:
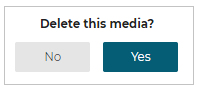
- Click the Yes button to delete the image. The image has been removed from the media.
- The Download option is displayed when the mouse cursor hovers over the 2D plans.
- The 2D plans are automatically generated according to the products available in the project, they cannot be deleted.
If you have not created any images, to create an image click the Create Image option.
For more information, see Create Image 🔗
To ensure stable and optimal rendering of the widget, we strongly recommend limiting the number of media assets to a maximum of 50 images, including all types sucn as screenshot, realistic image and other visuals. Staying within this limit helps prevent performance issues and supports a smooth, consistent user experience.
The Rendering in progress message is displayed while the image is being rendered.